German AWD
Moderators: Mikewire, Rennwagen1
-
kevin286
- In the trunk...

- Posts: 337
- Joined: Jul Sat 05, 2008 10:23 am
- Vehicles: 02 M3, 06 Taco DCSB, 90 240 Wagon
- Location: Moab, UT
- Contact:
Re: German AWD
Still waiting on some parts for the radio install so I worked on some odds and ends.
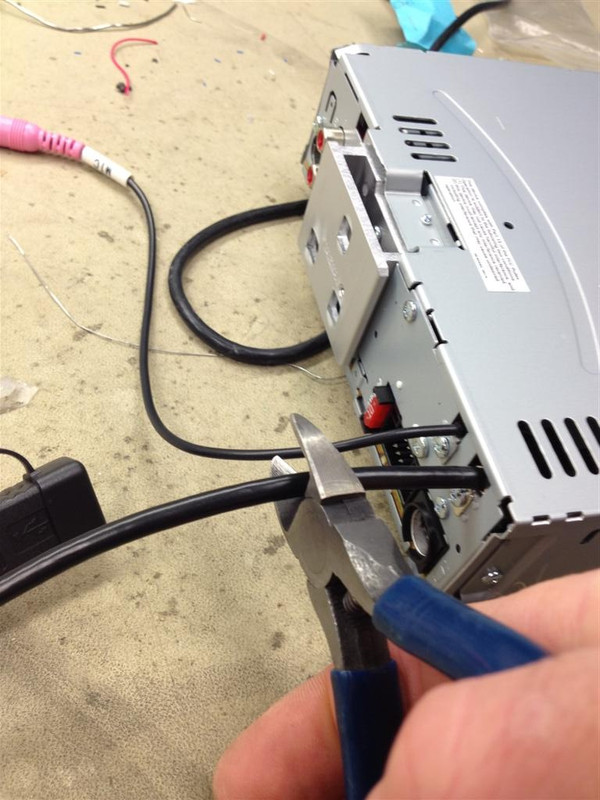
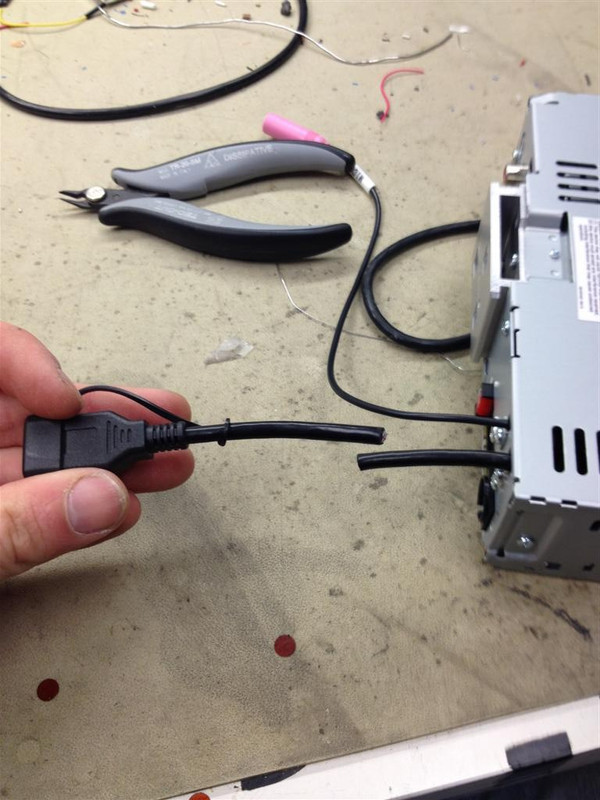
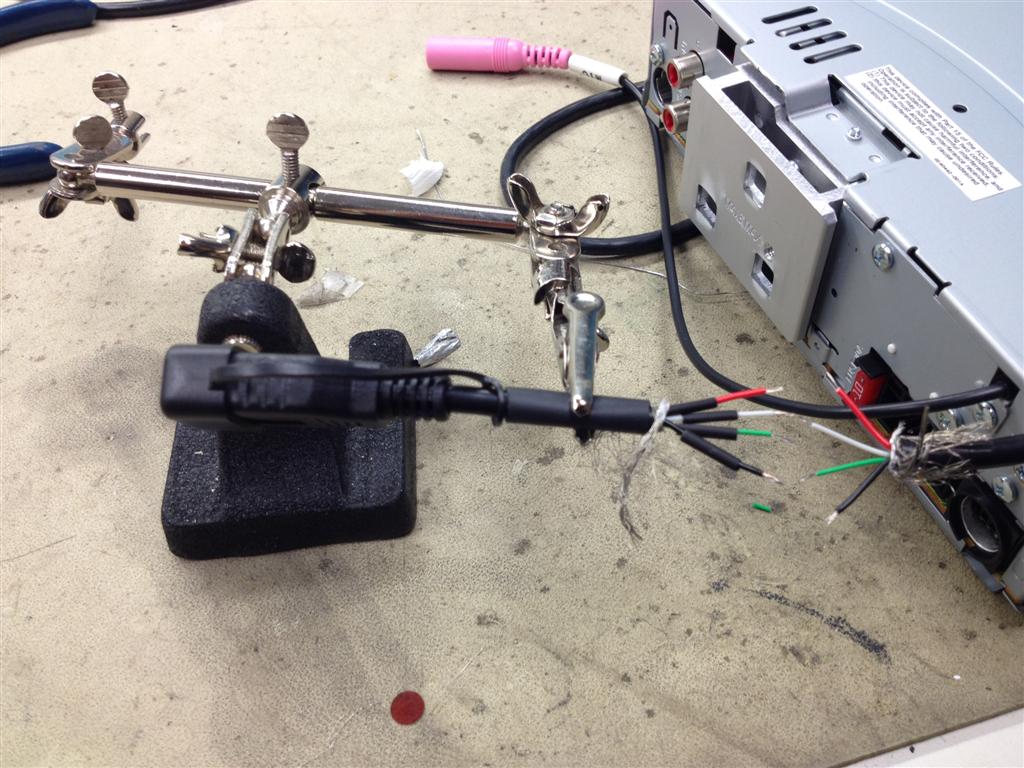
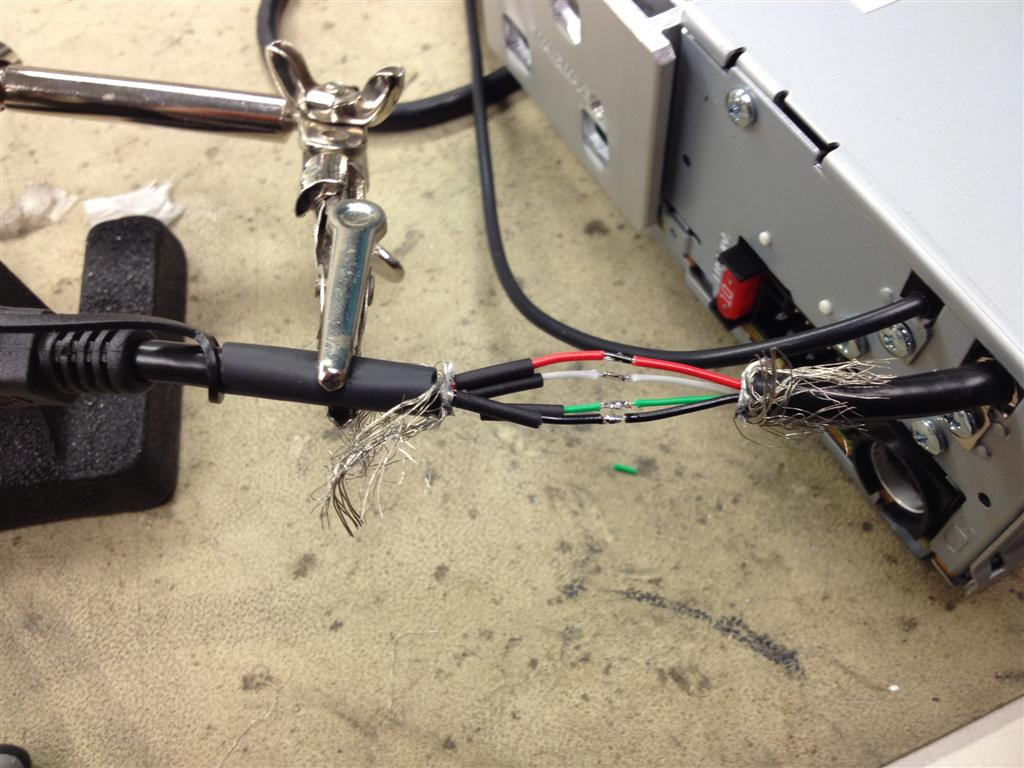
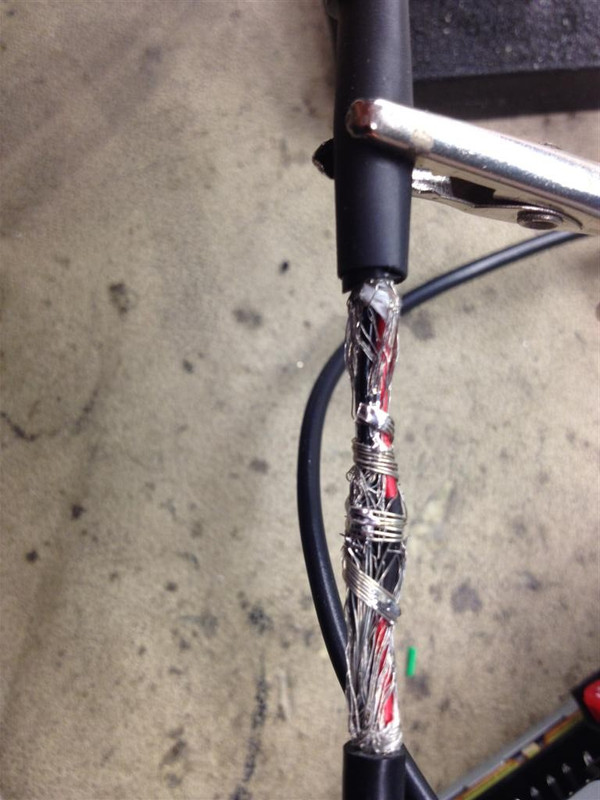
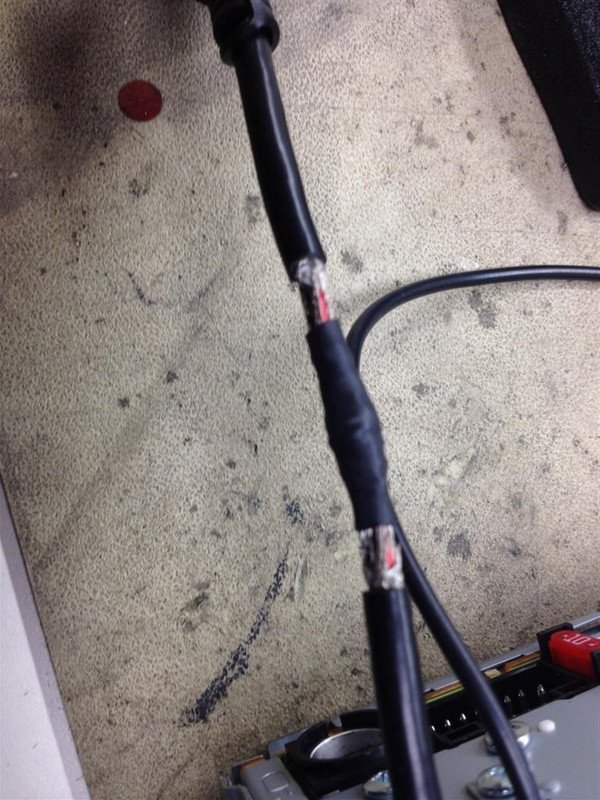
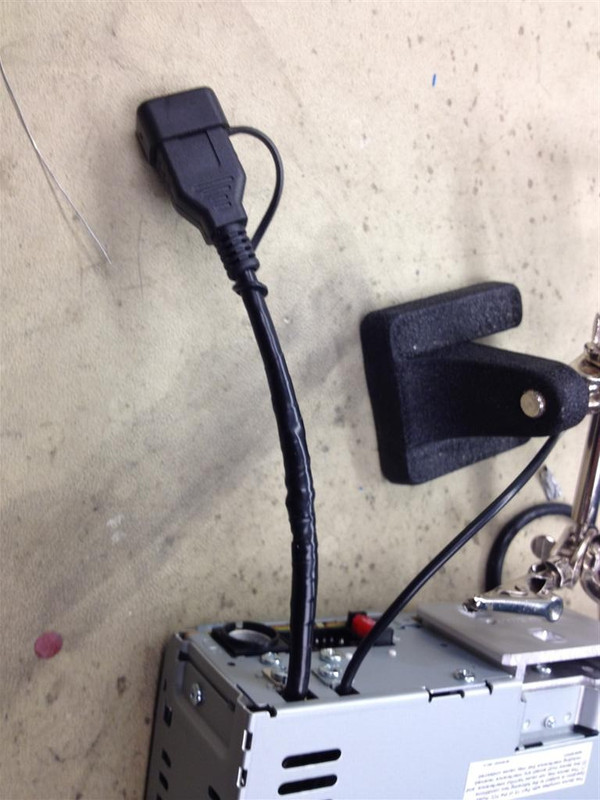
I wanted to shorten the USB pigtail on the rear of the radio because there was just too much there. I already have USB stubbed out to the deck area so no need to have a big bundle of wire back in there.
Cut it up
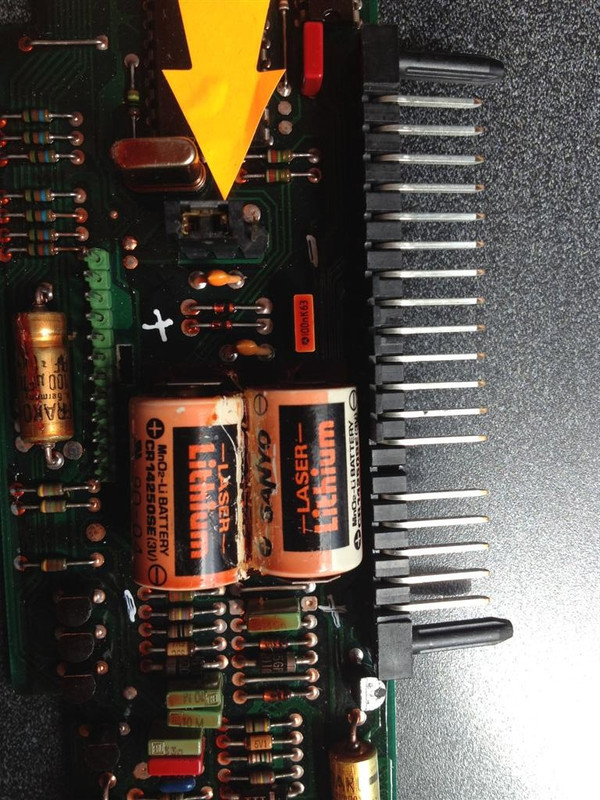
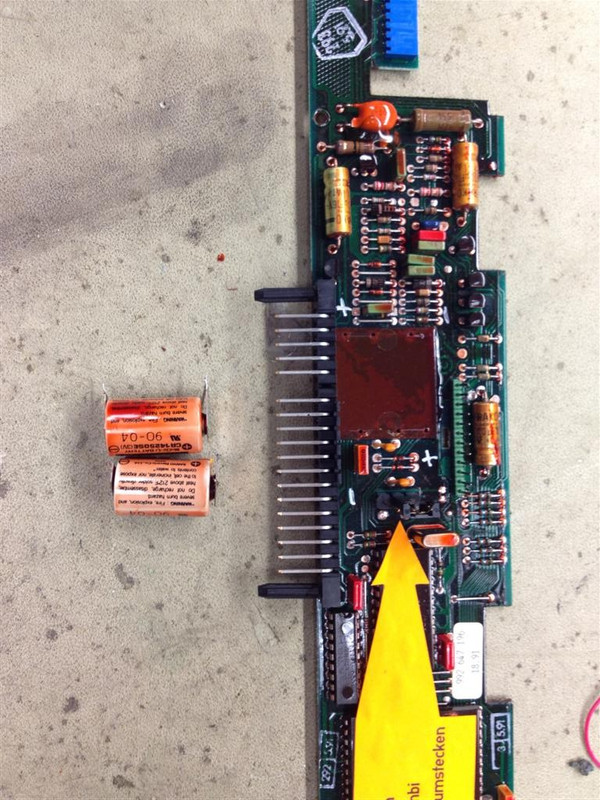
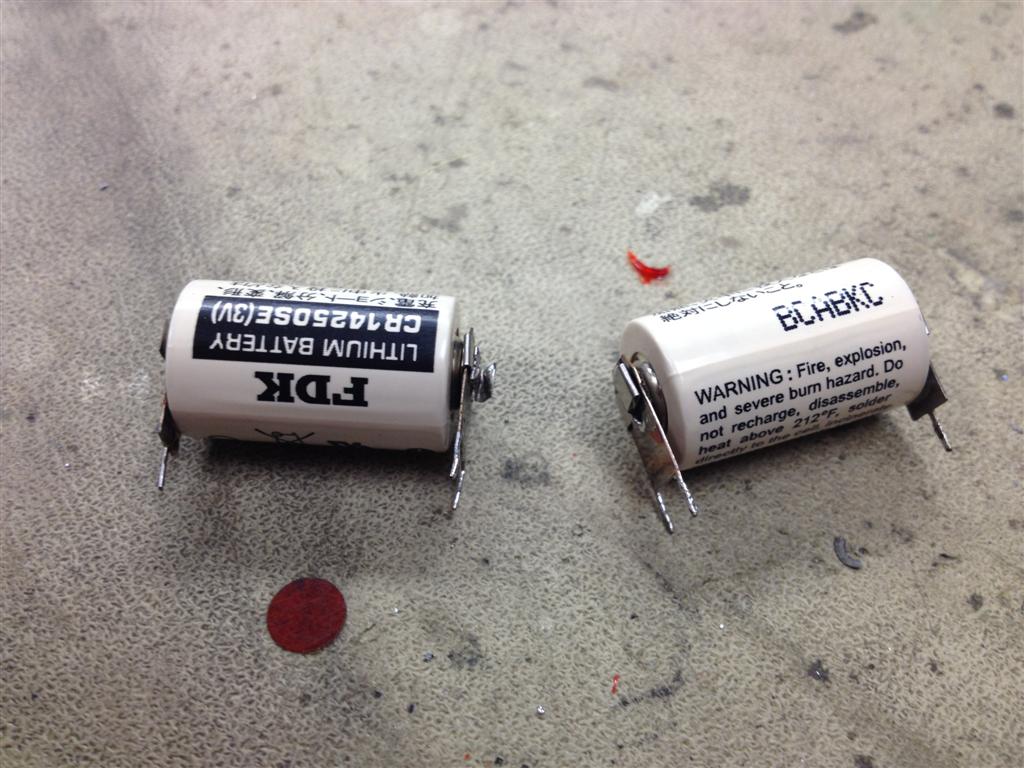
Then to prep for the new batteries that should show up tomorrow I removed the old ones from the instrument cluster electronics board.
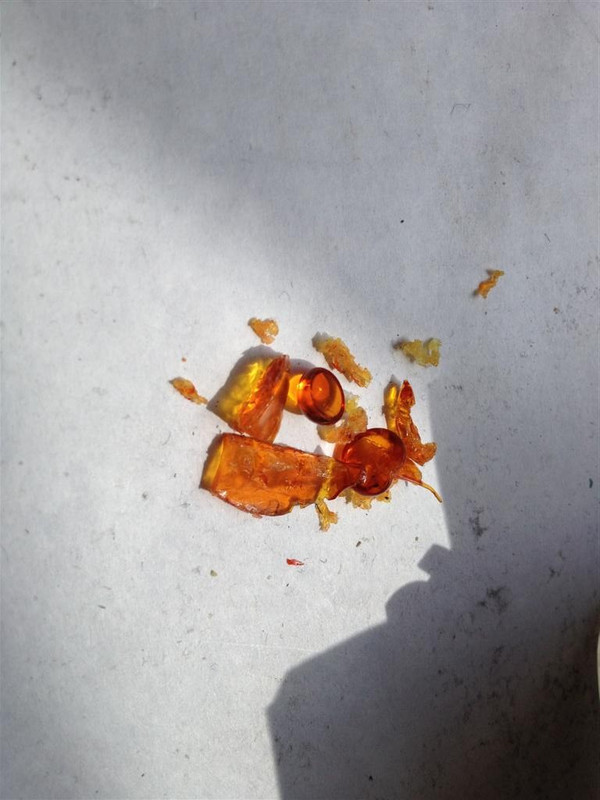
Scrape off the glue stuff holding the batteries together
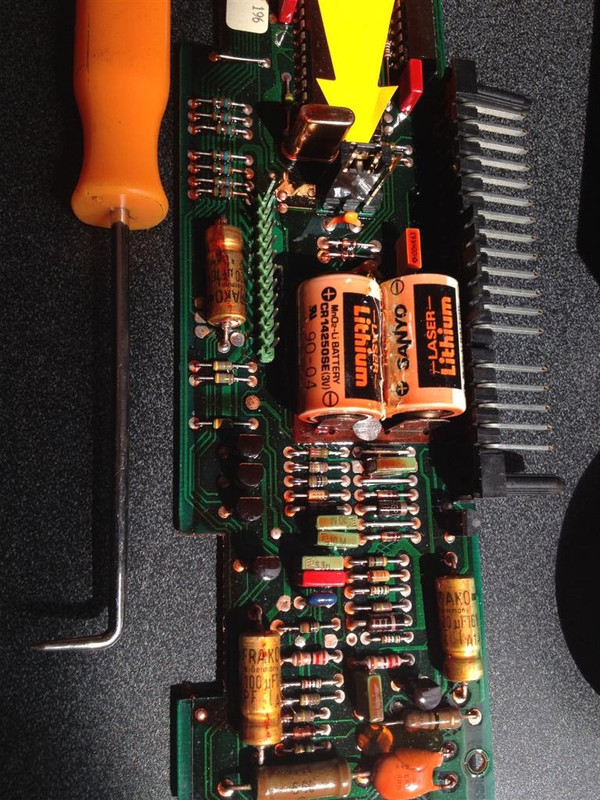
Mark the board with paint pen with polarity. I'd hate to smoke it hooking the new ones up backwards.
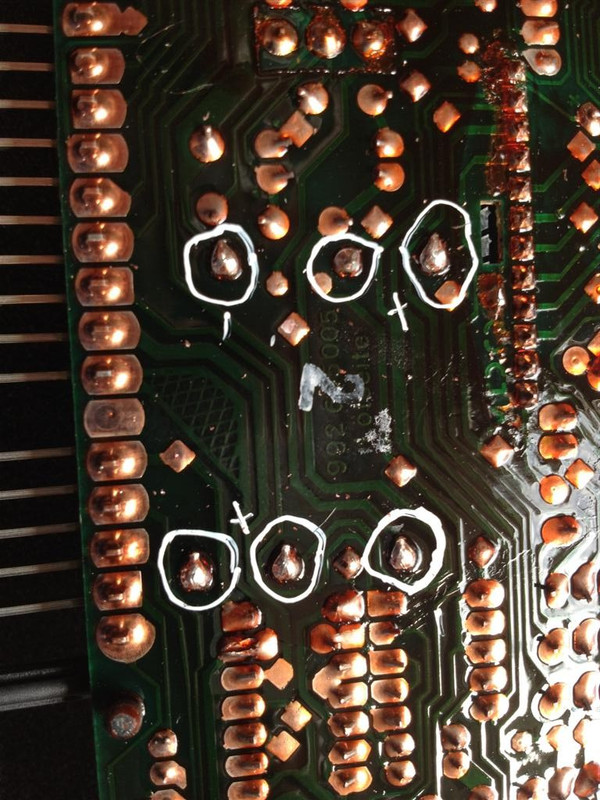
remove the solder. This is a solder sucker. Heats it up, then push the button and suck suck suck... oh I'm getting distracted. You get the idea
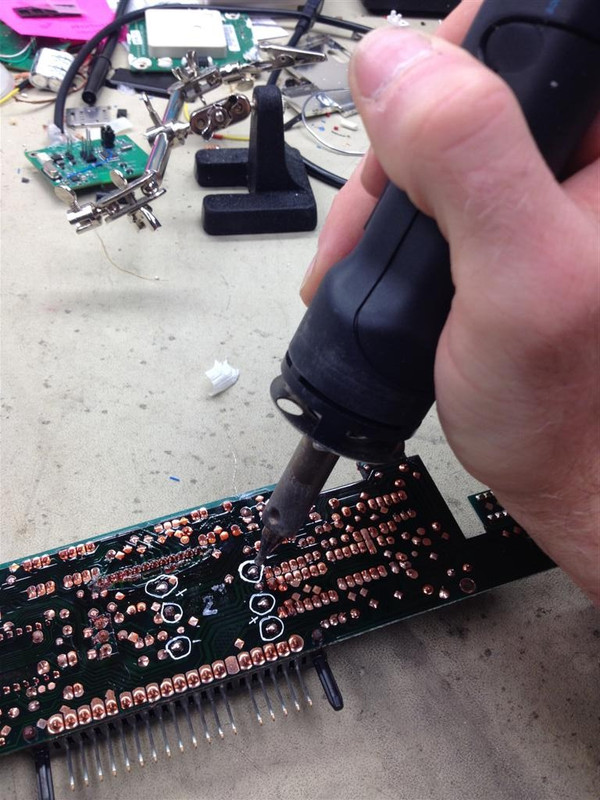
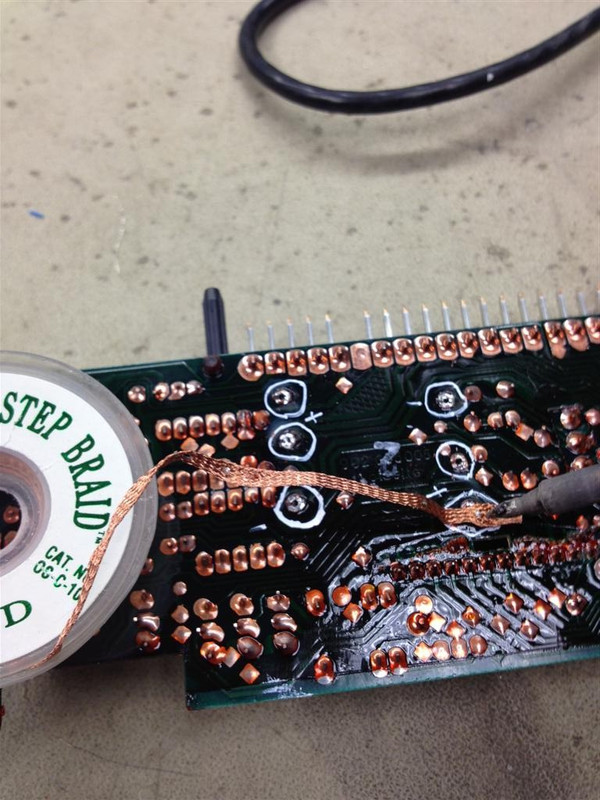
After removed, clean up the solder pads to prep them for the new install
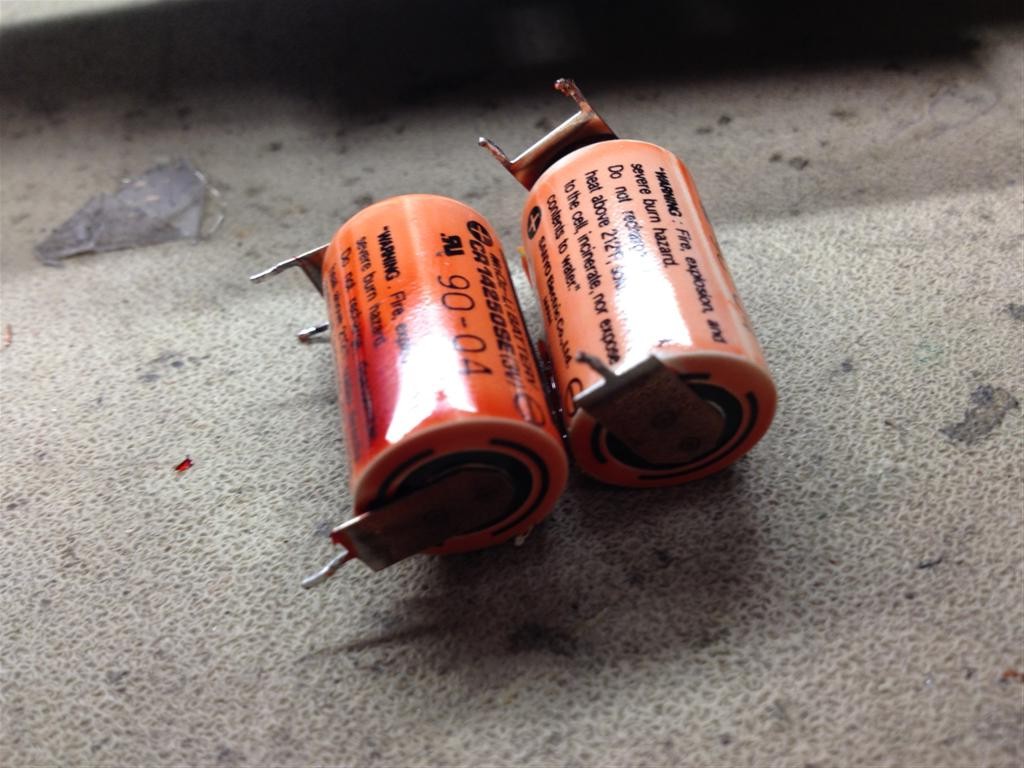
Here they are removed. I ordered new with tabs, I hope they're the same or I might have to get creative.
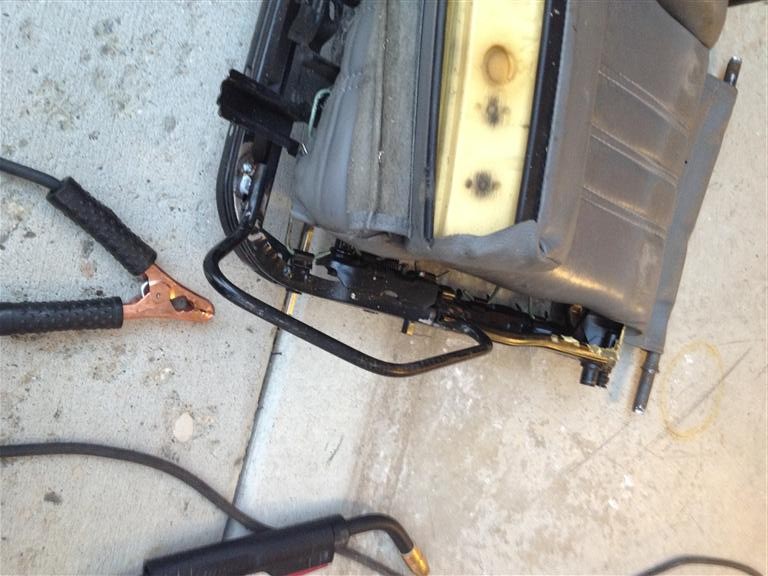
Next I took a look at my driver seat. It'd been feeling kinda woobly so I popped off the back and found one of the screws that holds the back to the seat was totally out and the other was very loose. One thing led to another and I removed the sliders degunked them, washed, painted and lubed them up.
This is cleaned... still look icky but it's clean, honest.
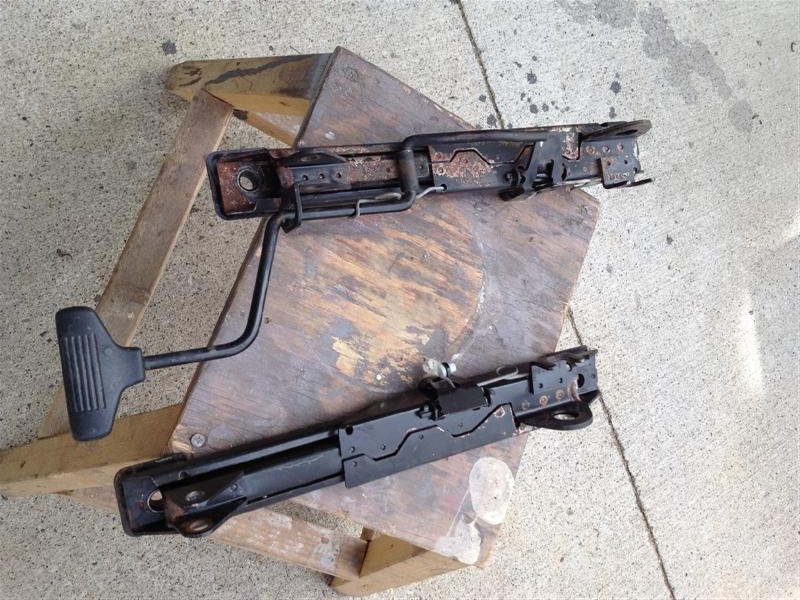
Here they are painted. Its not like you can see the top of the sliders when installed, so I didn't worry about getting a perfect paint job. Just enough to make it shiny and prevent rust.
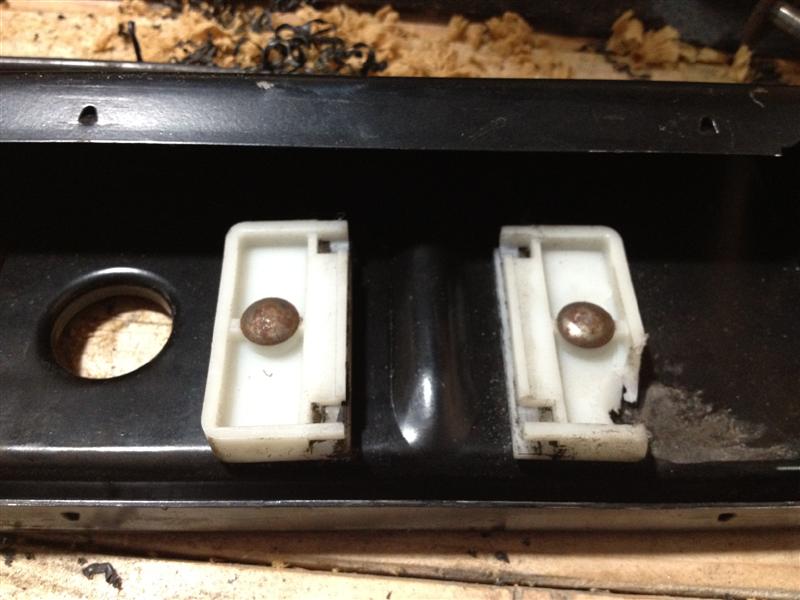
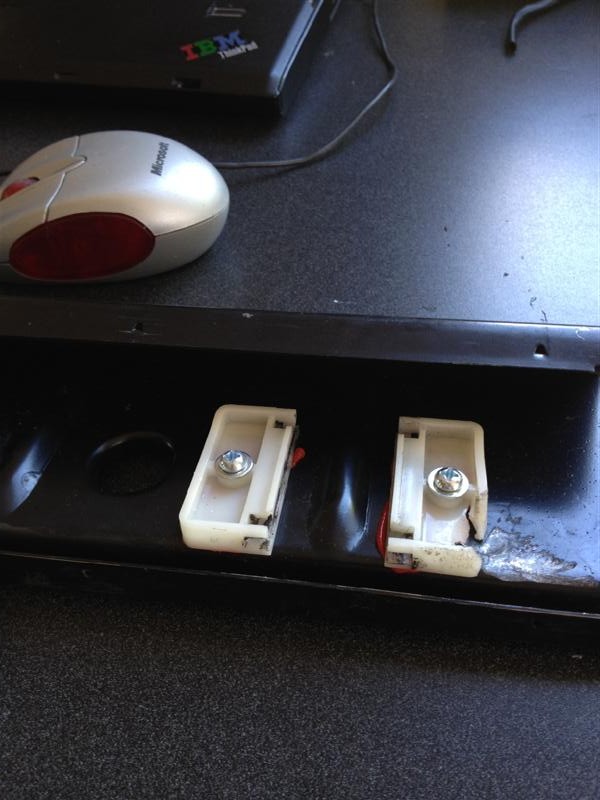
Found the thigh bolster was not quite attached right and some of the rivets holding the nylon sliders in place had become loose. I removed those and replaced with machine screws.
Dang rivets.. rivets are for airplanes not cars
some machine screws. Heck a little RTV just for well I don't know.. I felt like it.
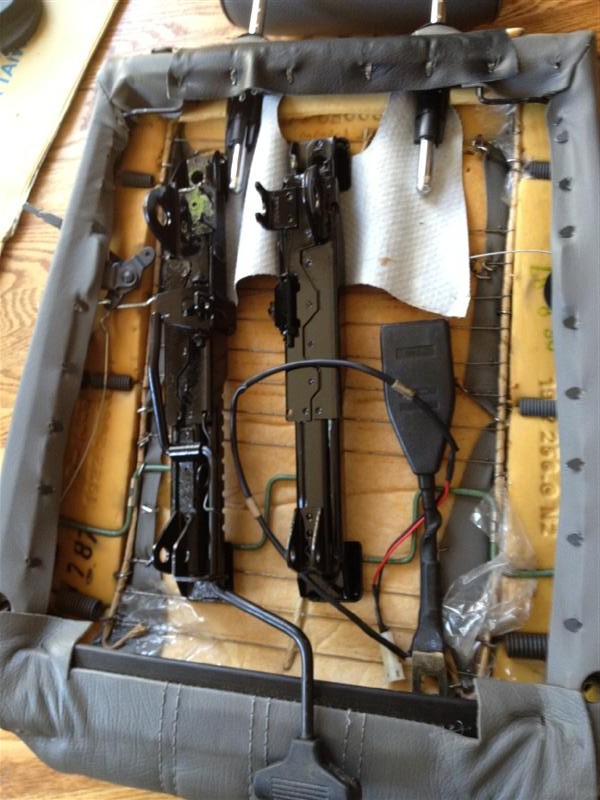
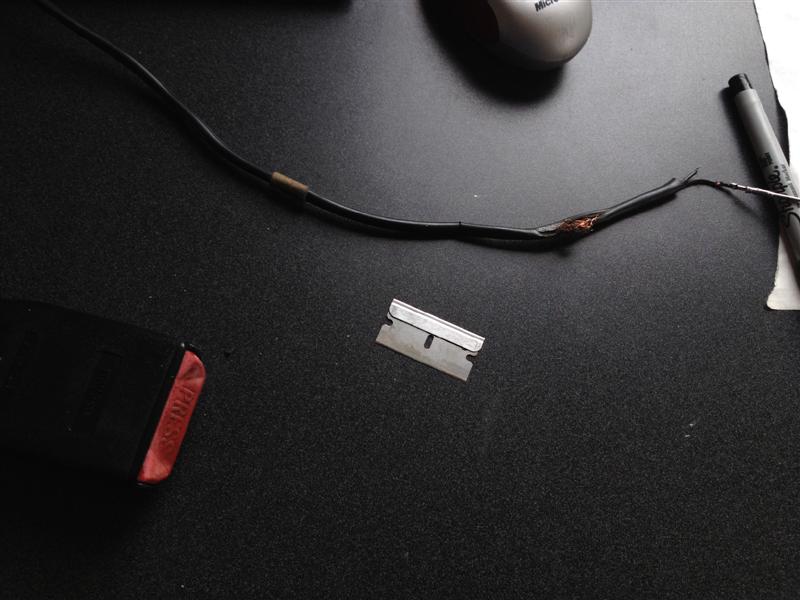
Also the seat belt switch wire at one point must have caught in something and was in need of repair.
Oooch, this couldn't still have been working.
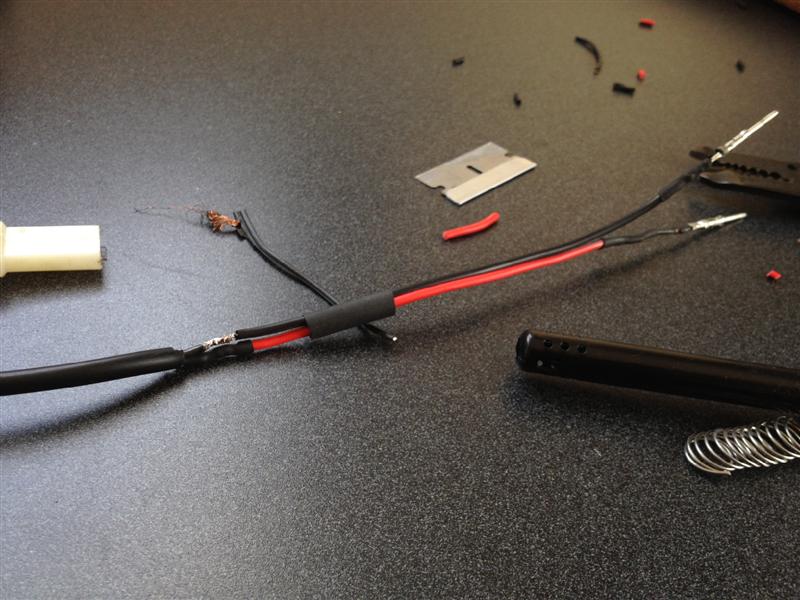
Almost fixed up.
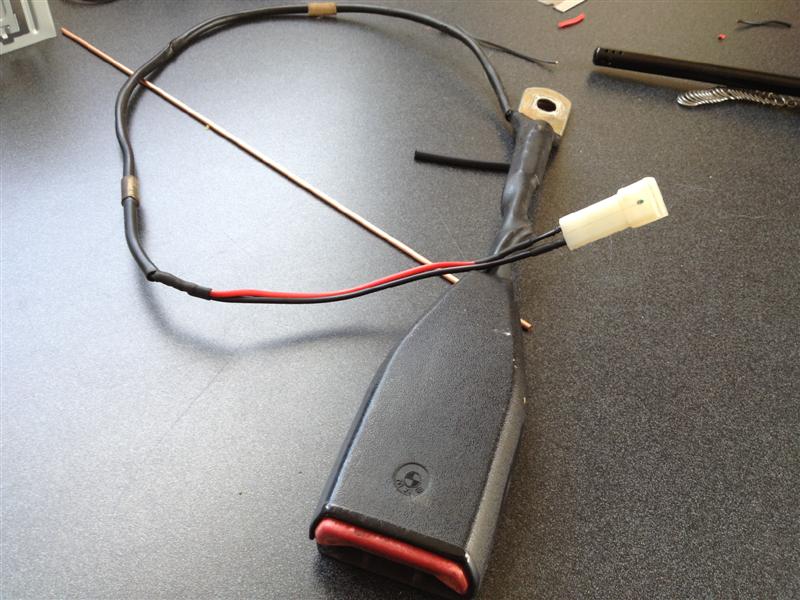
Ta da, all better
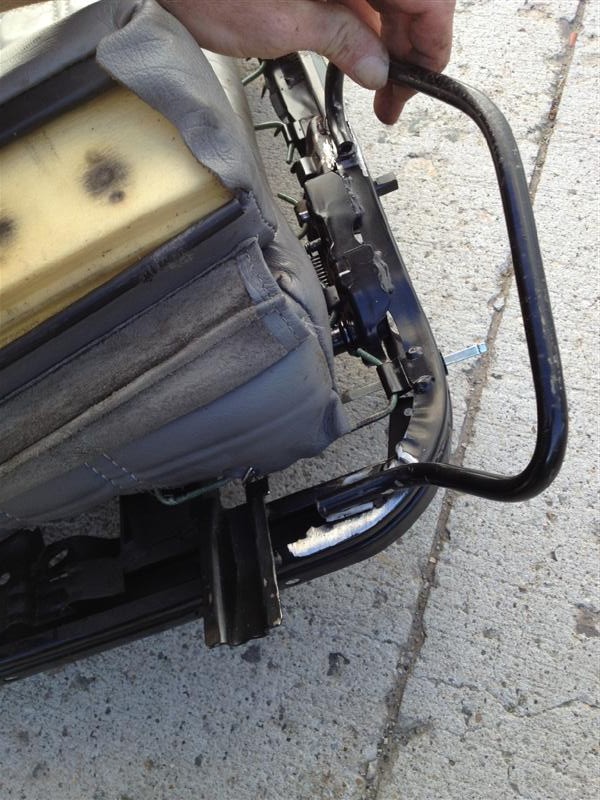
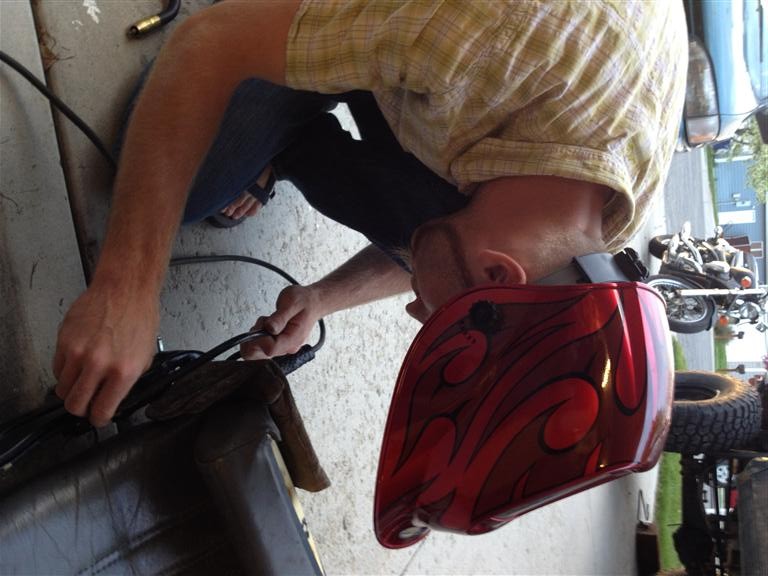
On reassembly I discovered that the seat side thing, had a metal bracket in it to provide support and shape that had broken off. It's welded in the front and along the side. Both welds totally broke. Took the leather off and removed the foam to expose the metal frame and cleaned up for welding
[imghttps://i.postimg.cc/QC0CJ1M7/bolsterSupportBroke.jpg][/img]
Got it all shined up and bent back into shape so it'll be ready to weld. Out of gas, should have it rock'n tomorrow or so.
That is all

I wanted to shorten the USB pigtail on the rear of the radio because there was just too much there. I already have USB stubbed out to the deck area so no need to have a big bundle of wire back in there.
Cut it up
Then to prep for the new batteries that should show up tomorrow I removed the old ones from the instrument cluster electronics board.
Scrape off the glue stuff holding the batteries together
Mark the board with paint pen with polarity. I'd hate to smoke it hooking the new ones up backwards.
remove the solder. This is a solder sucker. Heats it up, then push the button and suck suck suck... oh I'm getting distracted. You get the idea
After removed, clean up the solder pads to prep them for the new install
Here they are removed. I ordered new with tabs, I hope they're the same or I might have to get creative.
Next I took a look at my driver seat. It'd been feeling kinda woobly so I popped off the back and found one of the screws that holds the back to the seat was totally out and the other was very loose. One thing led to another and I removed the sliders degunked them, washed, painted and lubed them up.
This is cleaned... still look icky but it's clean, honest.
Here they are painted. Its not like you can see the top of the sliders when installed, so I didn't worry about getting a perfect paint job. Just enough to make it shiny and prevent rust.
Found the thigh bolster was not quite attached right and some of the rivets holding the nylon sliders in place had become loose. I removed those and replaced with machine screws.
Dang rivets.. rivets are for airplanes not cars
some machine screws. Heck a little RTV just for well I don't know.. I felt like it.
Also the seat belt switch wire at one point must have caught in something and was in need of repair.
Oooch, this couldn't still have been working.
Almost fixed up.
Ta da, all better
On reassembly I discovered that the seat side thing, had a metal bracket in it to provide support and shape that had broken off. It's welded in the front and along the side. Both welds totally broke. Took the leather off and removed the foam to expose the metal frame and cleaned up for welding
[imghttps://i.postimg.cc/QC0CJ1M7/bolsterSupportBroke.jpg][/img]
Got it all shined up and bent back into shape so it'll be ready to weld. Out of gas, should have it rock'n tomorrow or so.
That is all
Last edited by kevin286 on Jul Mon 01, 2019 4:24 pm, edited 1 time in total.
-
Rennwagen1

- The Dubfather

- Posts: 4166
- Joined: Nov Mon 06, 2006 5:21 pm
- Vehicles: 84 GTI, 97 GLX, 04 Touareg V6
- Location: ZooTown Represent!
Re: German AWD
One of the oldest stereo installer tricks in the book. Well at least the book that came out when remote bass knobs showed up. Good job!kevin286 wrote: Sure enough, it's just a POT with an RJ11 wired to the back. I drilled one of my blank off plates then trimmed down the existing hosing for the subwoofer level control and used JB weld to glue it to the back of the blank off plate.
Jd3 wrote:Once again I was slangin rocks and pimpin bitches. Got a degree from the streets. Listen to the song regulate by warren g. I wrote it.
Captain Pajama SharkMikeWire wrote:Vanilla Ice > Depeche Mode.
99% Awesome 100% of the time!!
1.8/2.8/3.2 OEM+
You can pay for school, but you can't buy class!

-
kevin286
- In the trunk...
- Posts: 337
- Joined: Jul Sat 05, 2008 10:23 am
- Vehicles: 02 M3, 06 Taco DCSB, 90 240 Wagon
- Location: Moab, UT
- Contact:
Re: German AWD
My order from Mouser came today so I had some goodies to play with.
Picked up some misc hardware from ACE and we're ready to start.
Guess where I'm going with this?
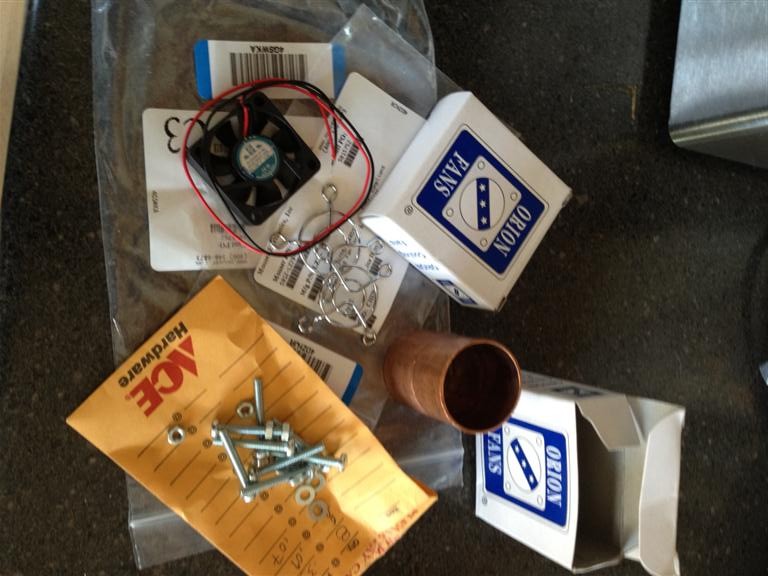
Some work with my dremel on the 1 1/4 copper joint
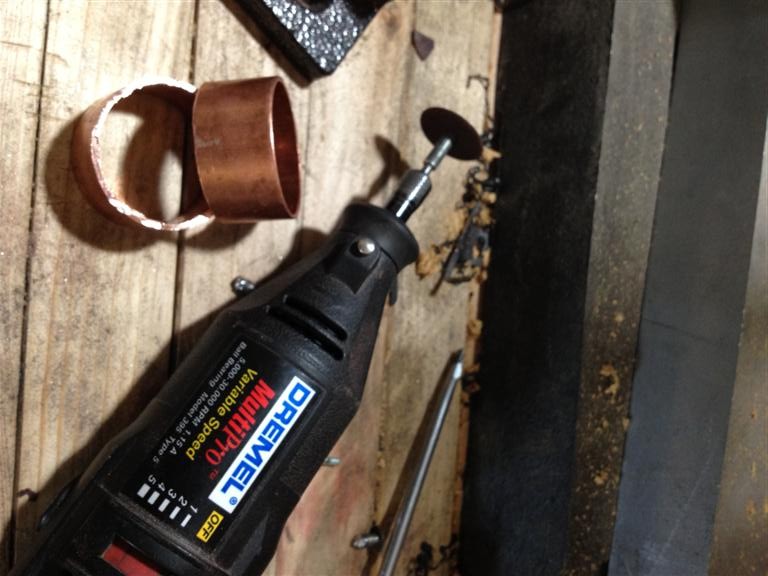
Test fit. I did this in the store but hey, just to give you a clue as to my plan.
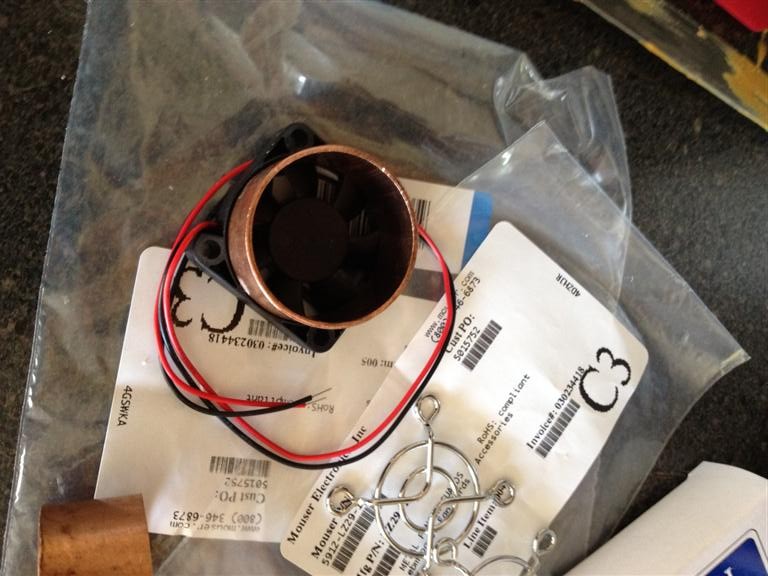
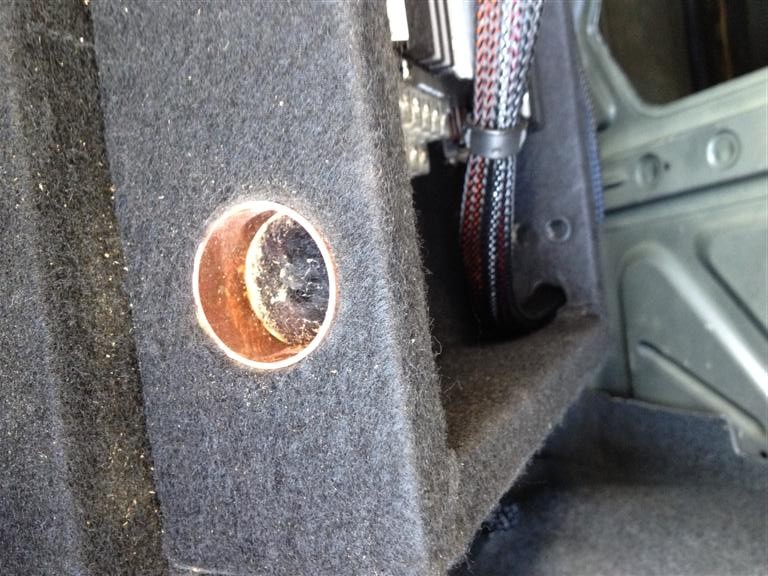
Okay, this gives it away. Perfect fit in the 1 1/2 hole saw hole. I X'd the felt on the inside, then pushed the pipe in so it'd tuck the felt in nice around the pipe. Snug.
A shot with the holes drilled and grill in place
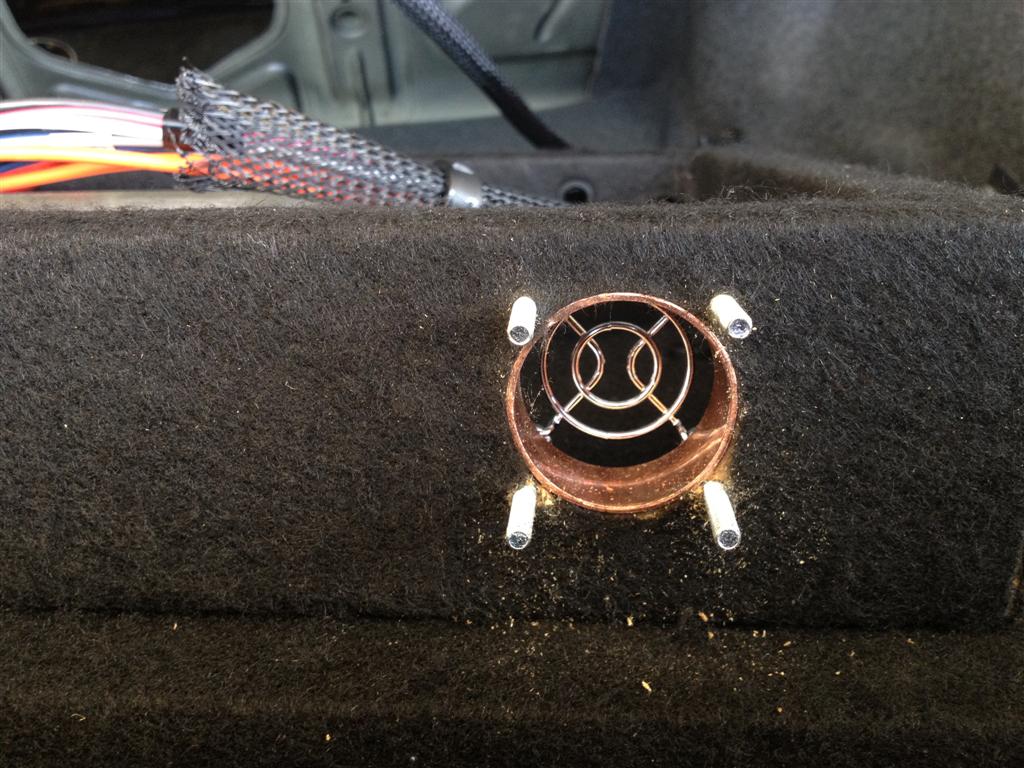
Tried it like this at first, but the fan was too close to the carpet, so I was afraid it wouldn't be able to suck good enough.
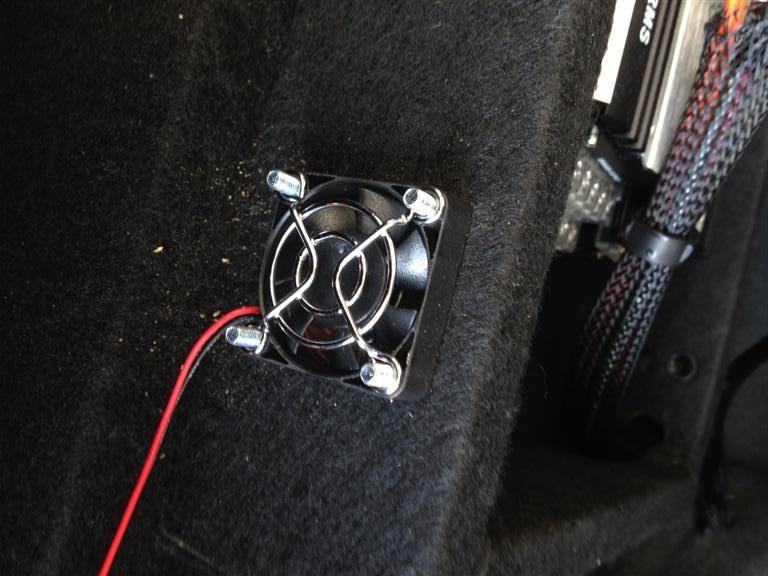
So then I switched it to the top.
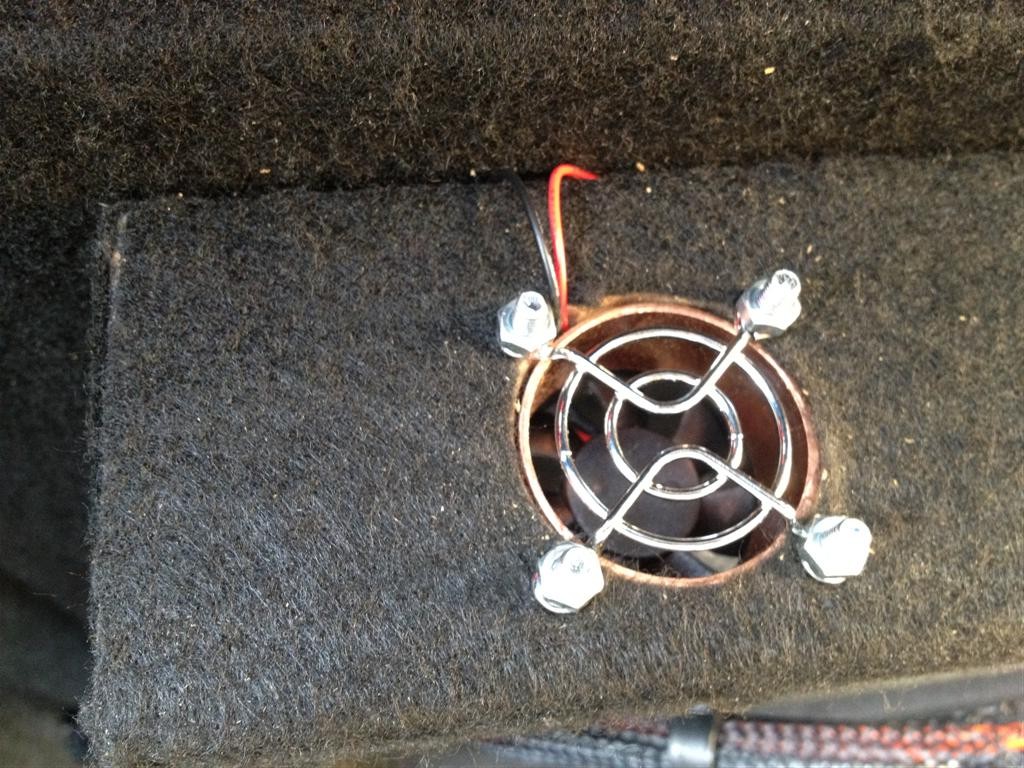

I used the red and black wires that I'd spliced earlier which are always on, and the remote wire from the radio to operate a bosch type relay to turn the fans on. They don't draw much, I could have probably wired them straight to the remote but this way sets me up nice for some cool neon or LEDs or something down the road.
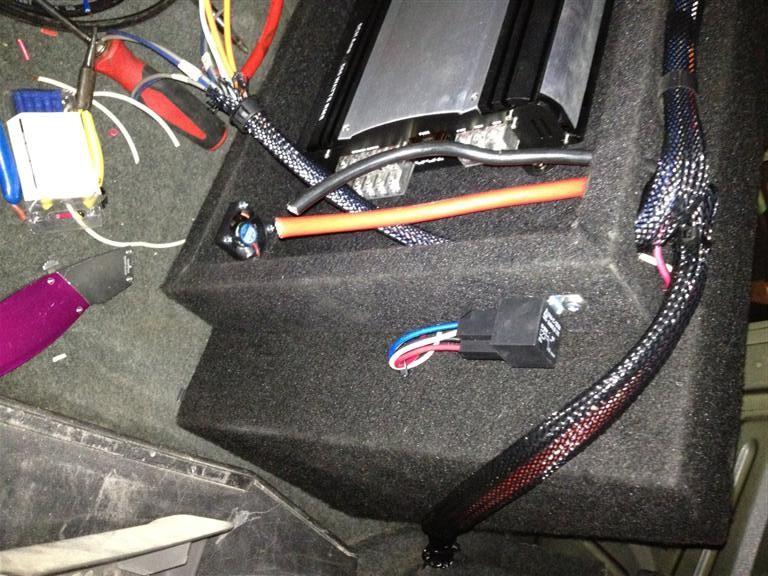
Next I started working out the final wiring, tucking stuff in place, etc. Here's the left side hookups
And the right side. Got the primary power hooked up before it was time to call it.
This stuff takes time. Props to those who do this for a living.
Picked up some misc hardware from ACE and we're ready to start.
Guess where I'm going with this?
Some work with my dremel on the 1 1/4 copper joint
Test fit. I did this in the store but hey, just to give you a clue as to my plan.
Okay, this gives it away. Perfect fit in the 1 1/2 hole saw hole. I X'd the felt on the inside, then pushed the pipe in so it'd tuck the felt in nice around the pipe. Snug.
A shot with the holes drilled and grill in place
Tried it like this at first, but the fan was too close to the carpet, so I was afraid it wouldn't be able to suck good enough.
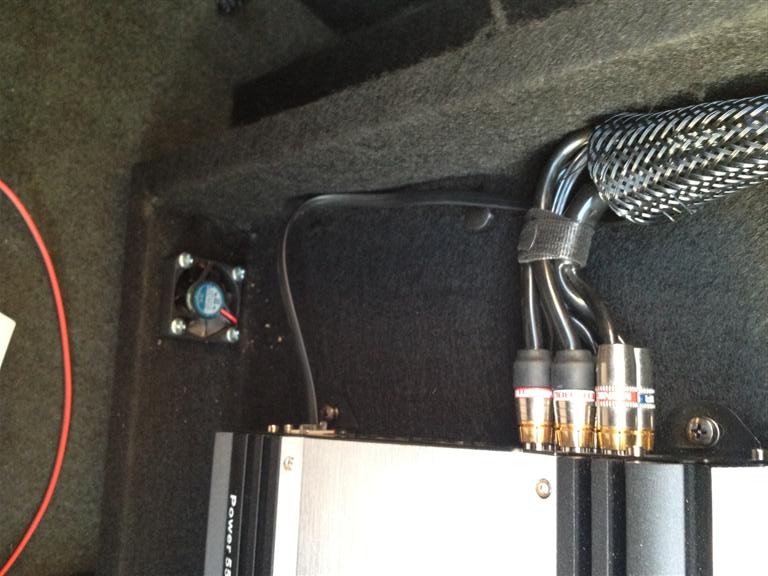
So then I switched it to the top.
I used the red and black wires that I'd spliced earlier which are always on, and the remote wire from the radio to operate a bosch type relay to turn the fans on. They don't draw much, I could have probably wired them straight to the remote but this way sets me up nice for some cool neon or LEDs or something down the road.
Next I started working out the final wiring, tucking stuff in place, etc. Here's the left side hookups
And the right side. Got the primary power hooked up before it was time to call it.
This stuff takes time. Props to those who do this for a living.
Last edited by kevin286 on Jul Mon 01, 2019 4:29 pm, edited 1 time in total.
-
kevin286
- In the trunk...
- Posts: 337
- Joined: Jul Sat 05, 2008 10:23 am
- Vehicles: 02 M3, 06 Taco DCSB, 90 240 Wagon
- Location: Moab, UT
- Contact:
Re: German AWD
Oh yeah, forgot, over lunch I did the batteries on my instrument cluster. These keep the flash memory powered so as to remember when it's time to change your oil and stuff.
Mine were at like 2.6 volts and with the sharp drop off curve of Lithium I figured I should replace them... Since i was there.
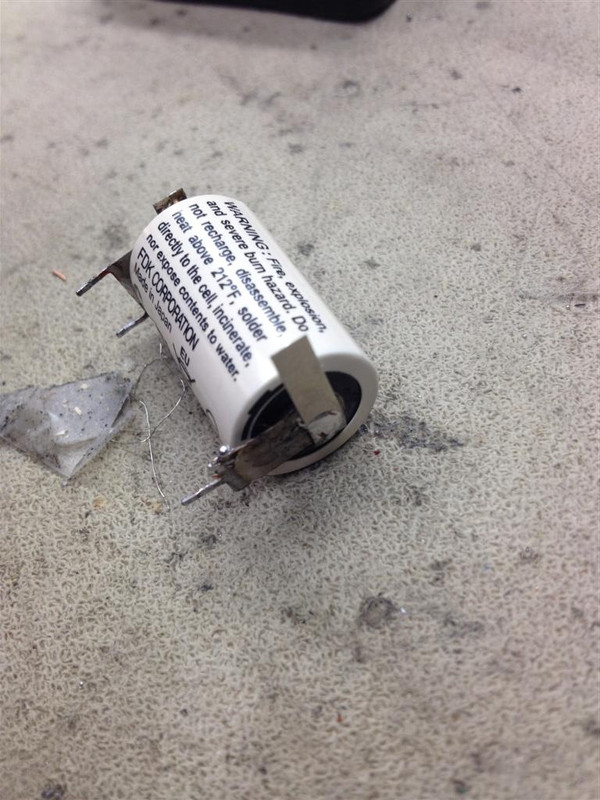
I ordered them with solder tabs on there, but of course they're not all fancy with pins for direct PCB mounting like the old.
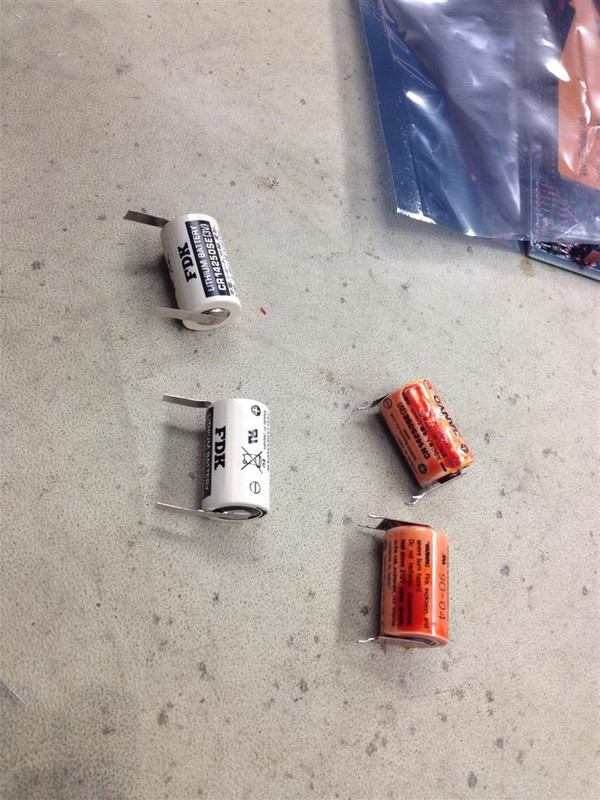
So I used some a pair of dykes and pulled off the old tabs, then bent the new ones around them and put some solder on. Dang it was hard to get good flow. This is only so so.
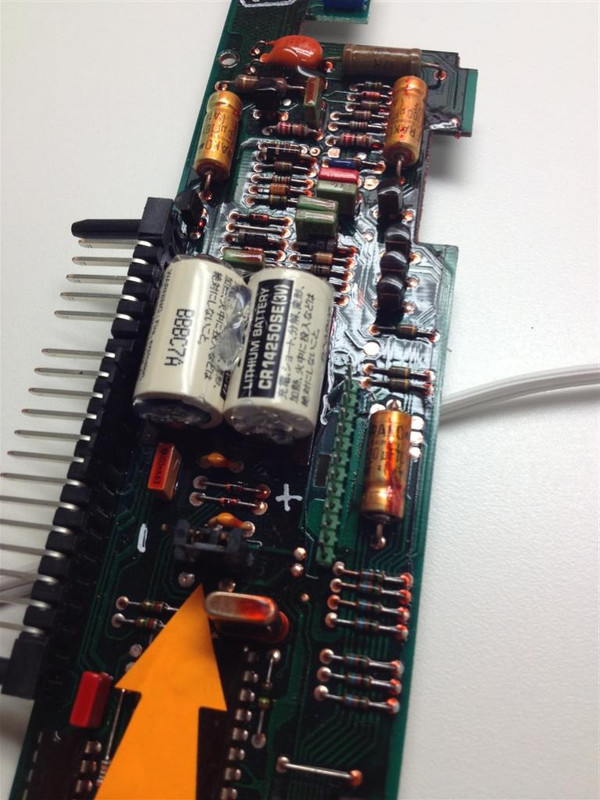
Both done

installed in place easy peasy
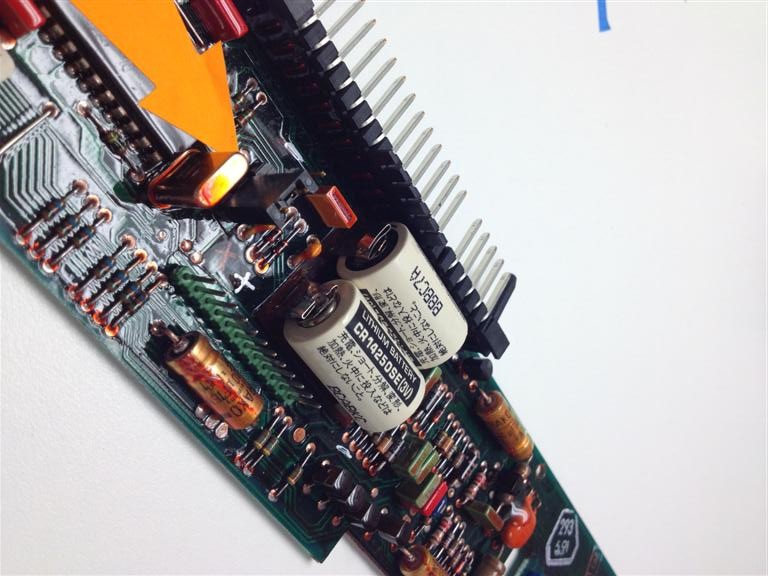
and some hot glue to hold it together like the original ones were.
Mine were at like 2.6 volts and with the sharp drop off curve of Lithium I figured I should replace them... Since i was there.
I ordered them with solder tabs on there, but of course they're not all fancy with pins for direct PCB mounting like the old.
So I used some a pair of dykes and pulled off the old tabs, then bent the new ones around them and put some solder on. Dang it was hard to get good flow. This is only so so.
Both done
installed in place easy peasy
and some hot glue to hold it together like the original ones were.
Last edited by kevin286 on Jul Mon 01, 2019 4:32 pm, edited 1 time in total.
-
kevin286
- In the trunk...
- Posts: 337
- Joined: Jul Sat 05, 2008 10:23 am
- Vehicles: 02 M3, 06 Taco DCSB, 90 240 Wagon
- Location: Moab, UT
- Contact:
Re: German AWD
Since the trunk carpet will be difficult to remove once the sub and amp are installed I decided to fix the saggy floor where the spare tire goes.
First, remove carpet and flip upside down. Peal up the fabric and remove the two half moon pieces of hardboard

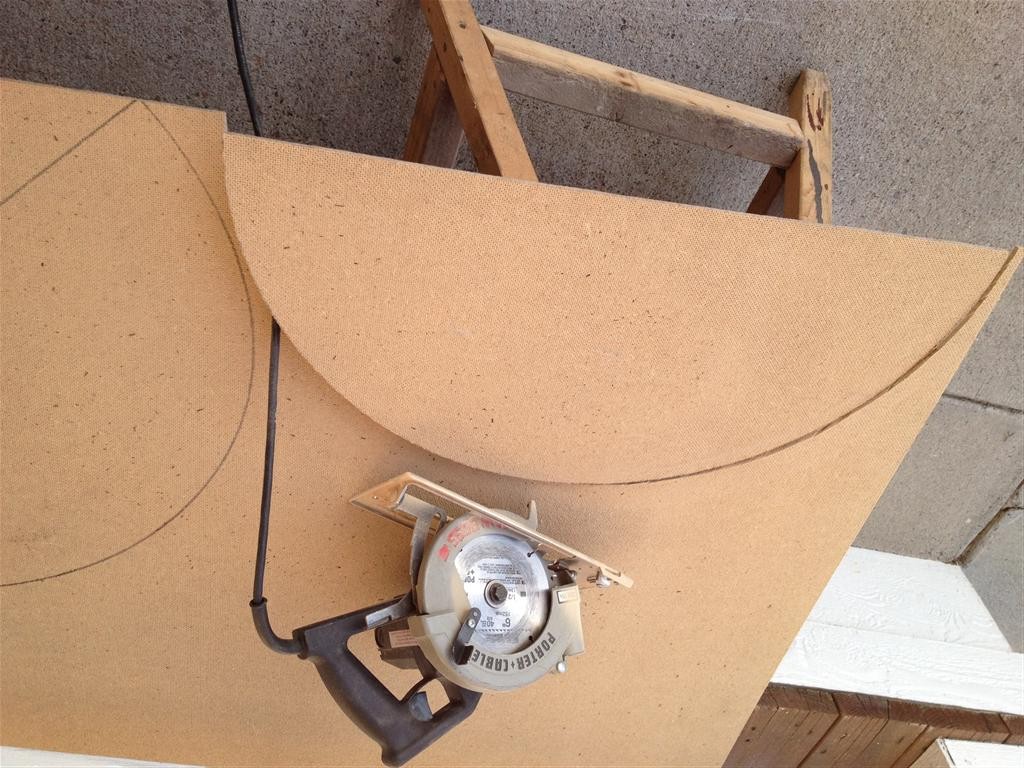
Trace pattern on new hard board
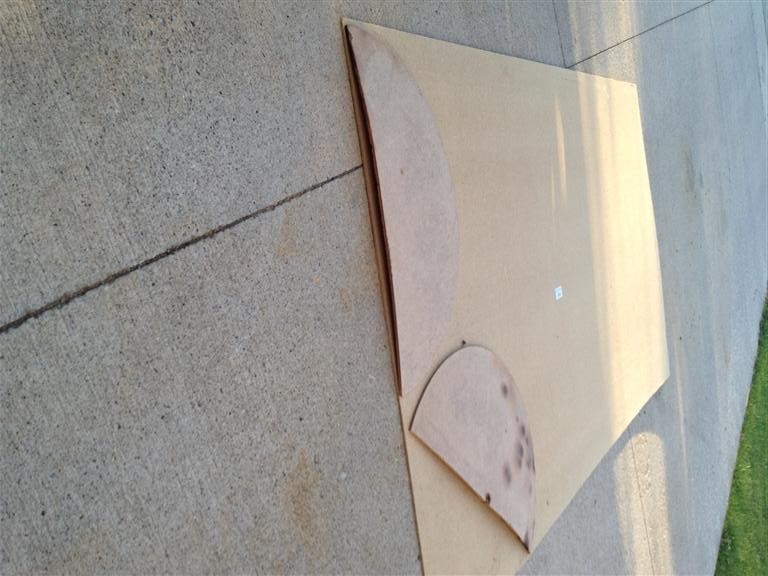
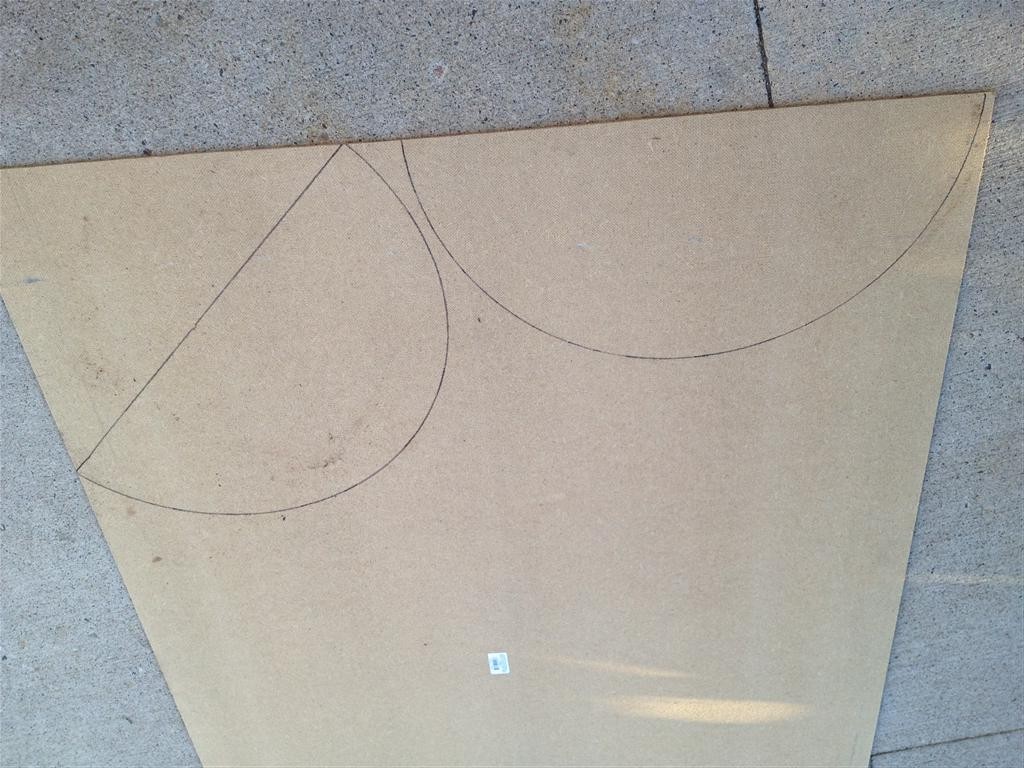
Cut out. Yes, I used a 6" circular saw. It worked great actually, just take care and keep your depth shallow and no problems
Made a cross support for over the spare tire. There might supposed to be something here normally... like a wheel or some other wheel hold in place thingy.

Re-assemble. I used 3M 80 spray glue to attach the fabric half back in place. I did also try doubling up on the moons, but it was too thick and wouldn't bend right so yeah. Back in place. no sag though now a poof up where the fabric had stretched.

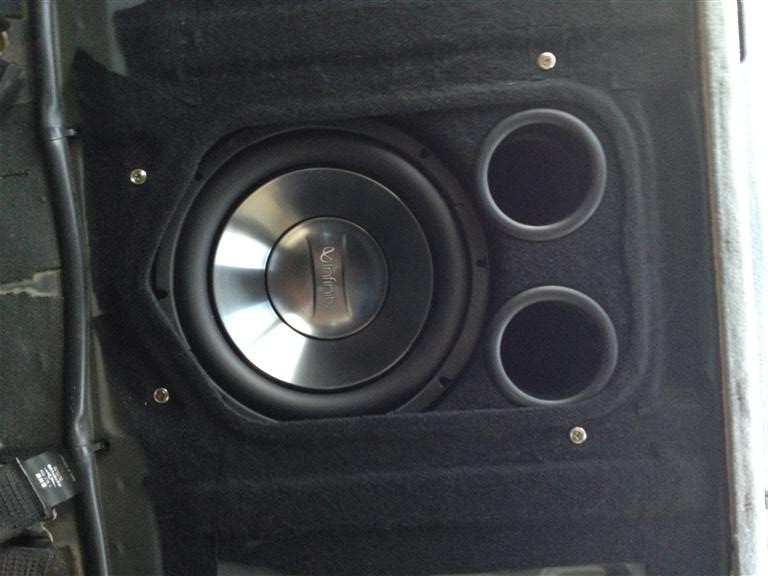
Time to install the subwoofer. It came with some foam tape. No directions for it, I figured it must be for sealing so I put it on the backside of the flange. With the carpet wrapping around into where this will rest on the box this is probably not needed but whatever.
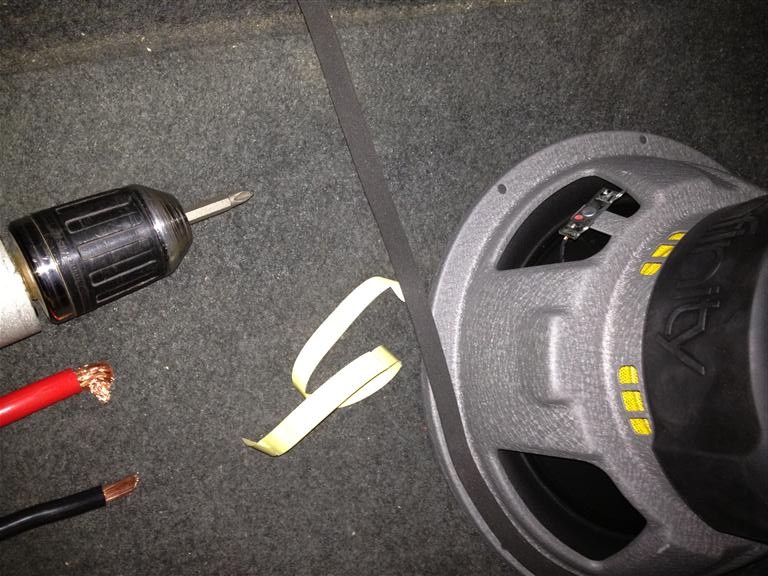
Hooked up the sub. Take note to watch the polarity on the sub terminals. + on the left on one side is NOT + on the left on the other, they flip flop. I hooked it up wrong the first time but on double check noticed.
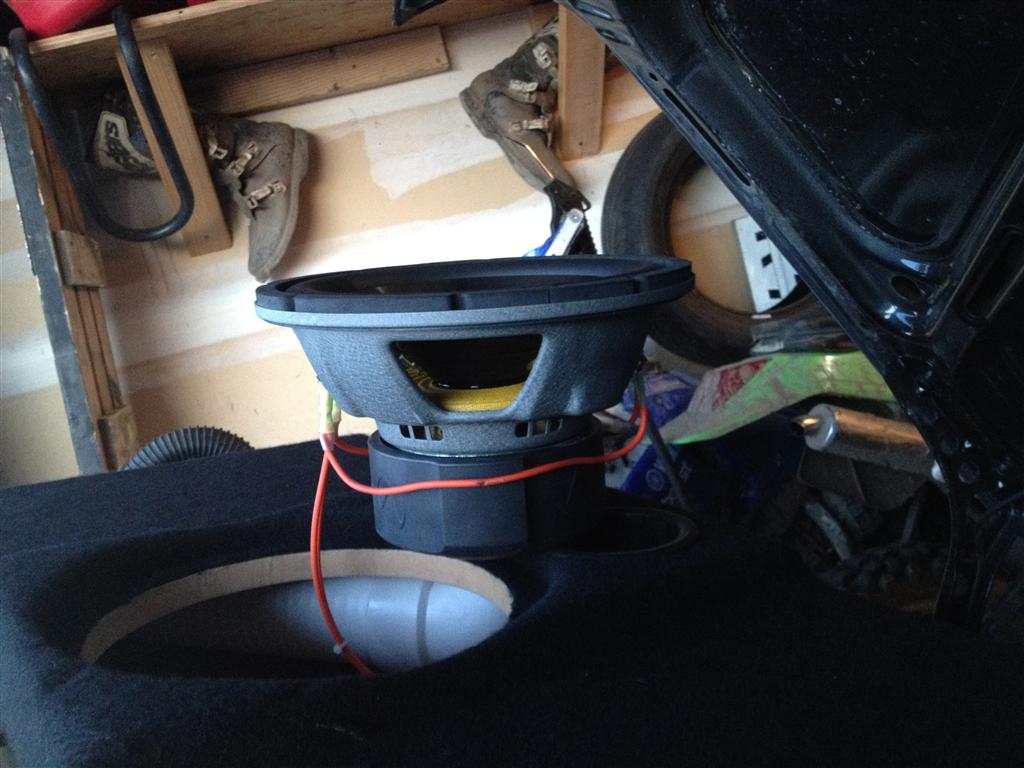
Rotate the sub so the logo is level to horizon and screw it in. Used regular 11/4 drywall screws
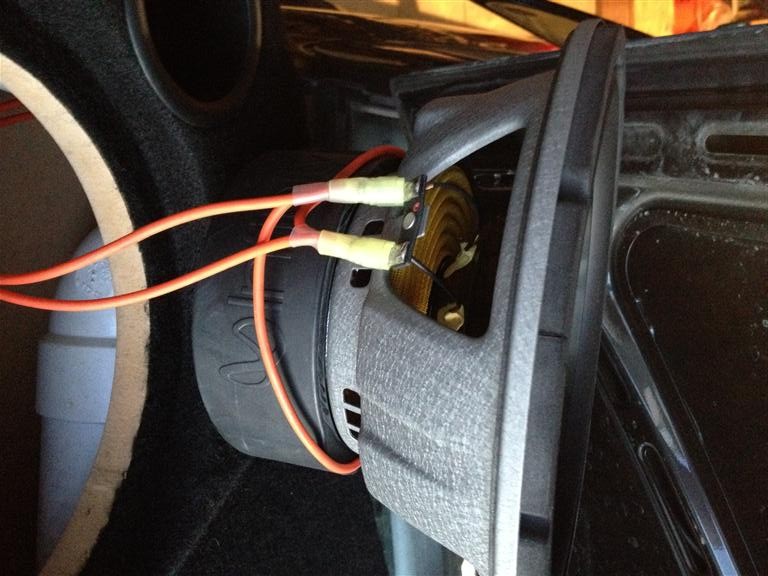
View from the inside, note it's not pushed all the way forward yet.
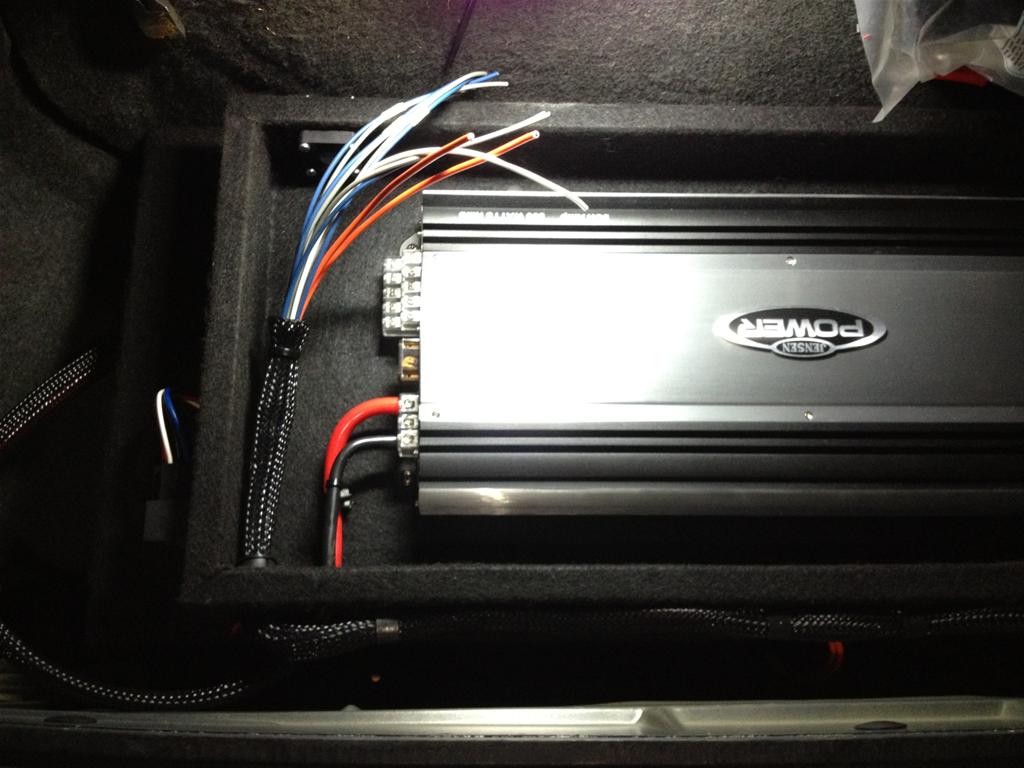
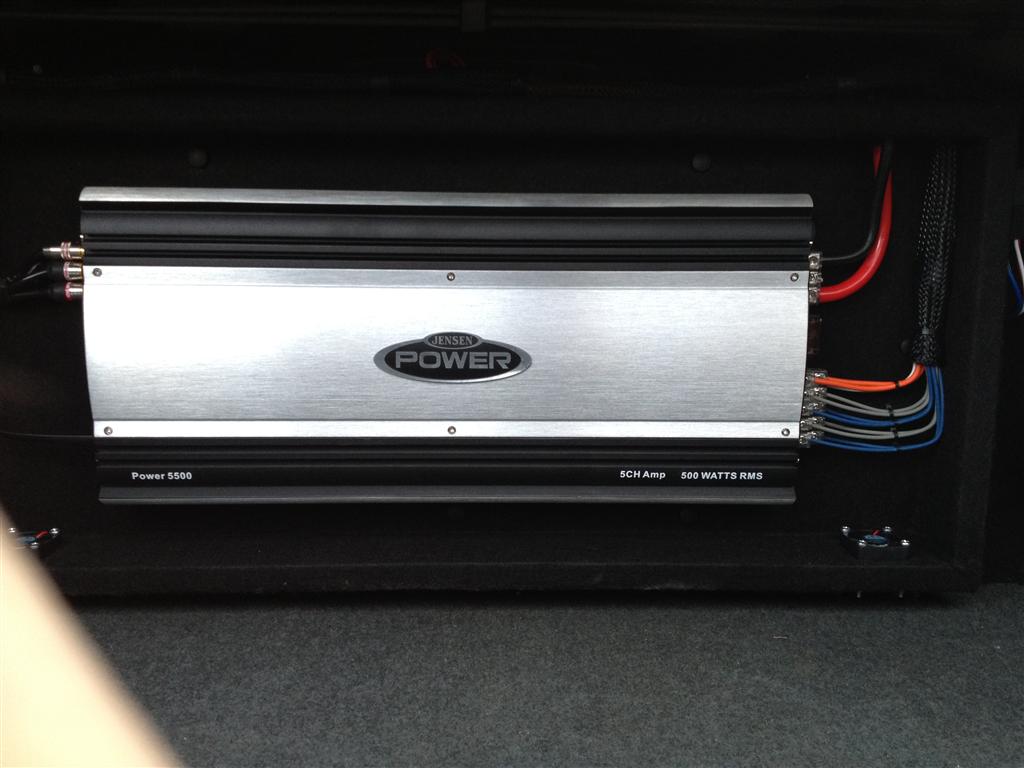
Back to wiring. Hook up the wires for the output to the speakers and sub. Do this one pair at a time.
Since I labeled my wires with tape, I just removed the tape and stuck it to the amp in front of me to remind me what speaker I was hooking up.

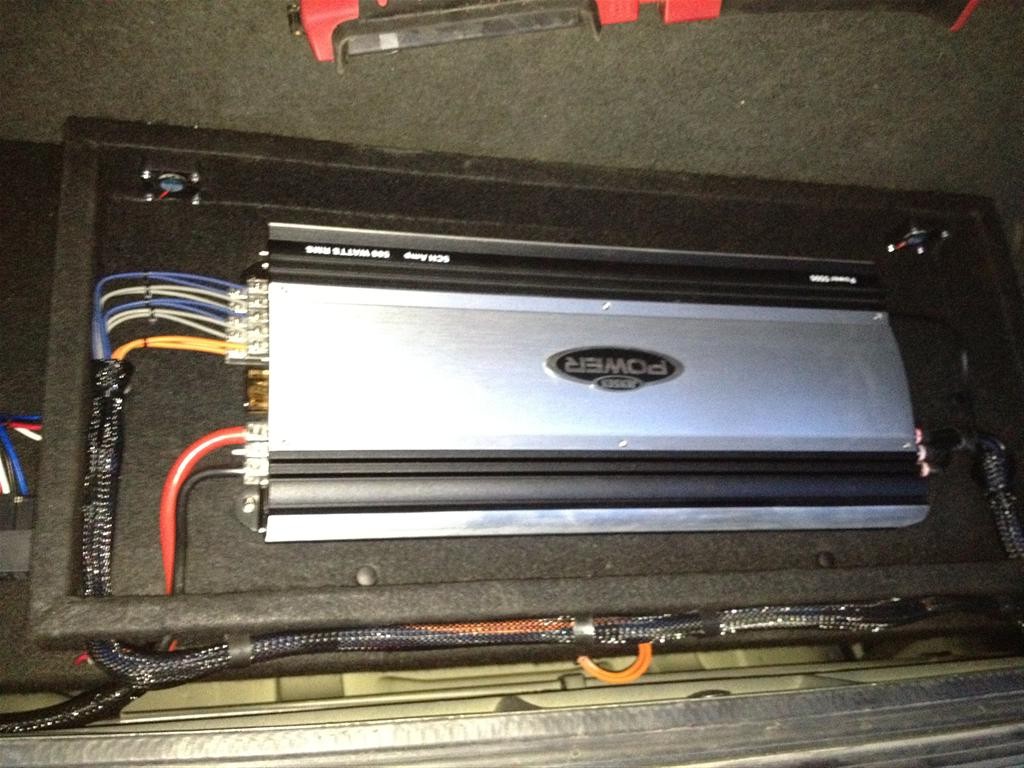
Question for audio guys or gals in the know: So I have 4 channels feeding the amp right, L & R, Front and Rear. I have 5 Channels output, the L & R Fronts and Rears PLUS the sub. So what do I set the mode on the amp to be, 4 chan or 5 chan ???
First, remove carpet and flip upside down. Peal up the fabric and remove the two half moon pieces of hardboard
Trace pattern on new hard board
Cut out. Yes, I used a 6" circular saw. It worked great actually, just take care and keep your depth shallow and no problems
Made a cross support for over the spare tire. There might supposed to be something here normally... like a wheel or some other wheel hold in place thingy.
Re-assemble. I used 3M 80 spray glue to attach the fabric half back in place. I did also try doubling up on the moons, but it was too thick and wouldn't bend right so yeah. Back in place. no sag though now a poof up where the fabric had stretched.
Time to install the subwoofer. It came with some foam tape. No directions for it, I figured it must be for sealing so I put it on the backside of the flange. With the carpet wrapping around into where this will rest on the box this is probably not needed but whatever.
Hooked up the sub. Take note to watch the polarity on the sub terminals. + on the left on one side is NOT + on the left on the other, they flip flop. I hooked it up wrong the first time but on double check noticed.
Rotate the sub so the logo is level to horizon and screw it in. Used regular 11/4 drywall screws
View from the inside, note it's not pushed all the way forward yet.
Back to wiring. Hook up the wires for the output to the speakers and sub. Do this one pair at a time.
Since I labeled my wires with tape, I just removed the tape and stuck it to the amp in front of me to remind me what speaker I was hooking up.
Question for audio guys or gals in the know: So I have 4 channels feeding the amp right, L & R, Front and Rear. I have 5 Channels output, the L & R Fronts and Rears PLUS the sub. So what do I set the mode on the amp to be, 4 chan or 5 chan ???
Last edited by kevin286 on Jul Mon 01, 2019 4:46 pm, edited 1 time in total.
-
kevin286
- In the trunk...
- Posts: 337
- Joined: Jul Sat 05, 2008 10:23 am
- Vehicles: 02 M3, 06 Taco DCSB, 90 240 Wagon
- Location: Moab, UT
- Contact:
Re: German AWD
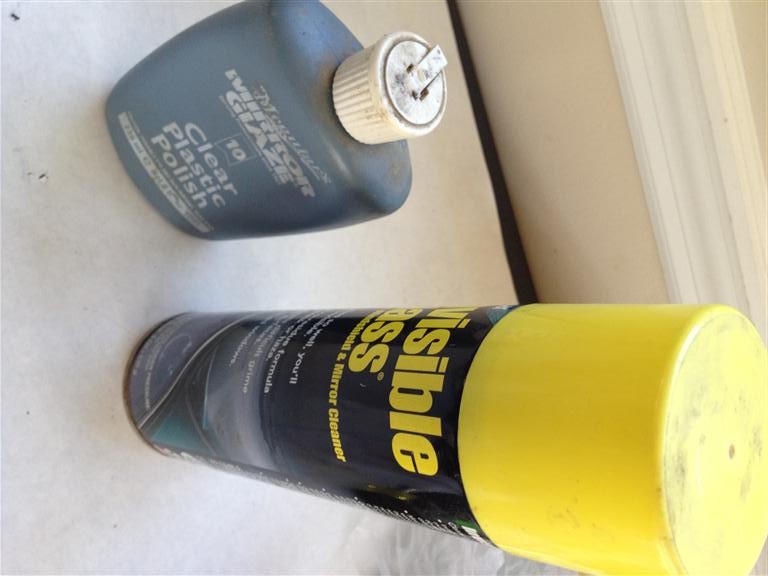
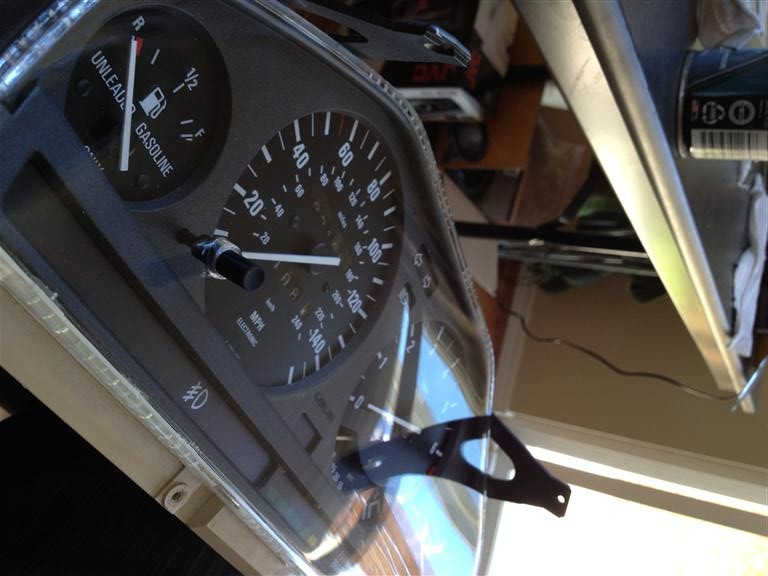
Also re-assembled my instrument cluster. The plastic lens was dirty and had some spots that looked like Armor All over spray but they would not come off with cleaner. So, I used some elbow grease and plastic polish and it looks better.
Before (it's yucky you just can see). This is just barely glued in place.

Product
After (it's clean)
Meh, might as well since I'm here, easy to do when it's out.
Before (it's yucky you just can see). This is just barely glued in place.
Product
After (it's clean)
Meh, might as well since I'm here, easy to do when it's out.
Last edited by kevin286 on Jul Mon 01, 2019 4:48 pm, edited 1 time in total.
-
MT-Getto

- Euro Addict!!!

- Posts: 2747
- Joined: Dec Sun 17, 2006 11:46 am
- Vehicles: 20VTMK2GLI
MK6DSGGTI
2010PowerStroke - Location: Fraggle Rock
Re: German AWD
You are a machine. Come work on my car please 
It's not how fast you go. It's how well you go fast.
-
kevin286
- In the trunk...
- Posts: 337
- Joined: Jul Sat 05, 2008 10:23 am
- Vehicles: 02 M3, 06 Taco DCSB, 90 240 Wagon
- Location: Moab, UT
- Contact:
Re: German AWD
back to the fixing seat thing.
Hold the bracket support piece in place
Zap zap it up
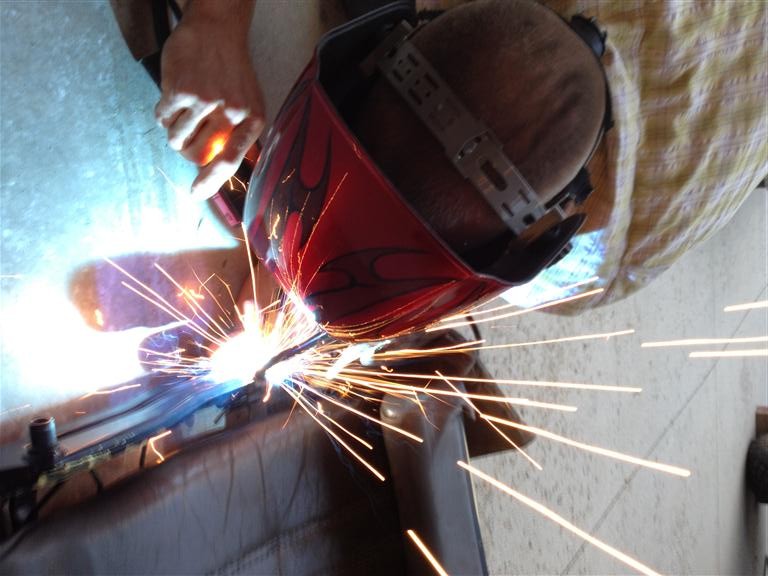
Check that it's good, yeah, good enough decent penetration.
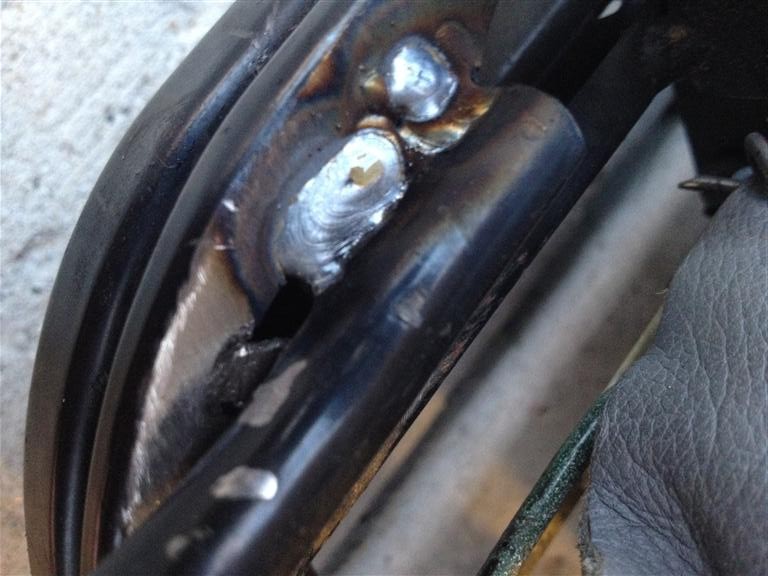
All fixed and ready for reassembly
Hold the bracket support piece in place
Zap zap it up
Check that it's good, yeah, good enough decent penetration.
All fixed and ready for reassembly
Last edited by kevin286 on Jul Mon 01, 2019 4:50 pm, edited 1 time in total.
-
kevin286
- In the trunk...
- Posts: 337
- Joined: Jul Sat 05, 2008 10:23 am
- Vehicles: 02 M3, 06 Taco DCSB, 90 240 Wagon
- Location: Moab, UT
- Contact:
Re: German AWD
and back to the radio work
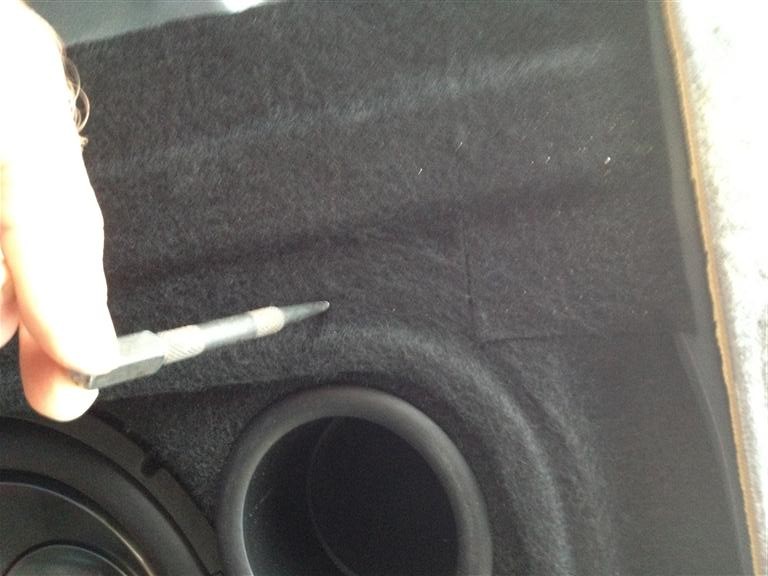
I don't have one now, but in the event I get a arm rest rear seat, I put some felt around the ski pass through hole so that when the arm rest that I don't have is down, it looks clean.

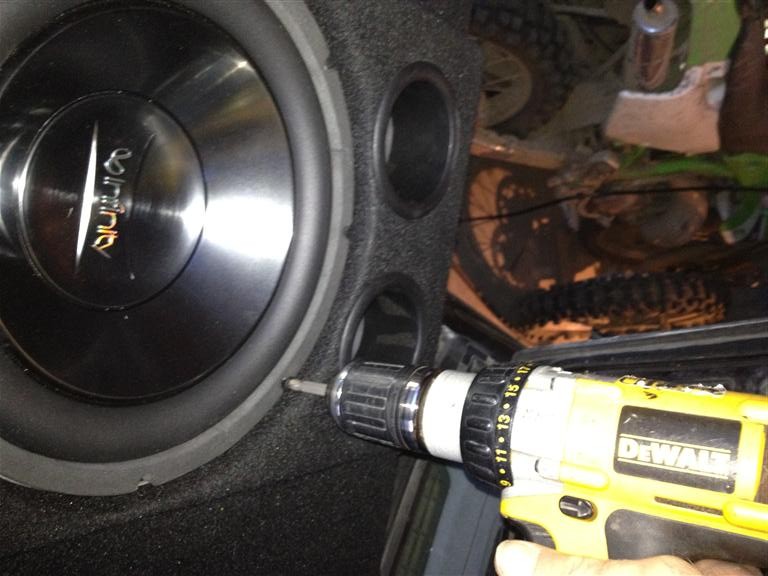
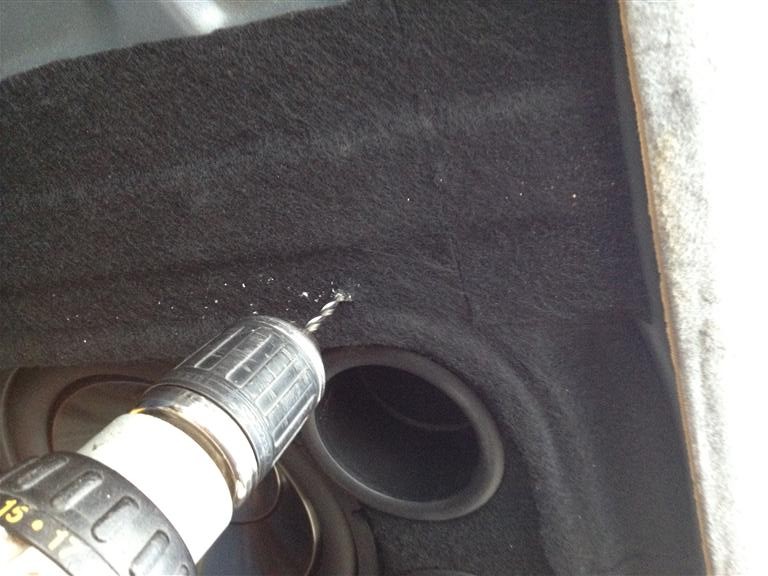
Then it was time to shove the whole box forward against the firewall. Took some grunt but fits nice. Then to screw it in, center punch
Drill
Screw
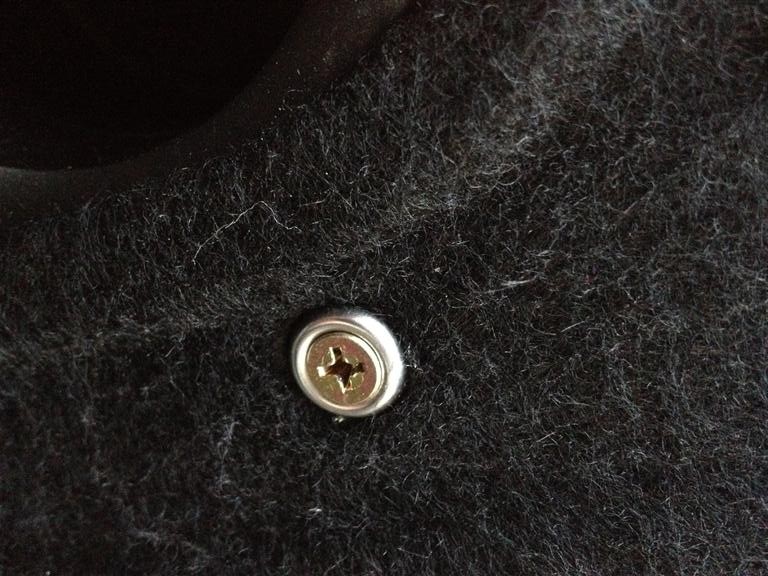
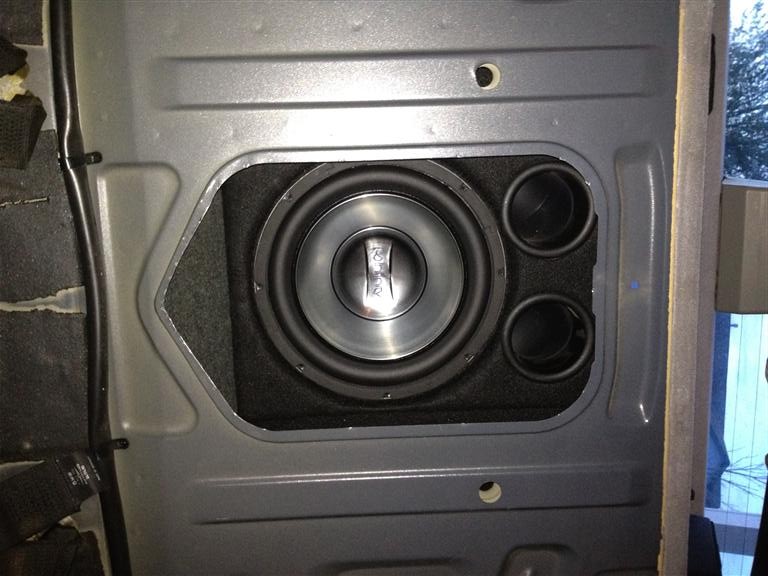
Attached
What it looks like from the trunk now
You did a good job, well thank you, here's a toast to you, you're too kind.

I don't have one now, but in the event I get a arm rest rear seat, I put some felt around the ski pass through hole so that when the arm rest that I don't have is down, it looks clean.
Then it was time to shove the whole box forward against the firewall. Took some grunt but fits nice. Then to screw it in, center punch
Drill
Screw
Attached
What it looks like from the trunk now
You did a good job, well thank you, here's a toast to you, you're too kind.
Last edited by kevin286 on Jul Mon 01, 2019 4:53 pm, edited 1 time in total.
